
Can You Add a Hood to a Blackstone Griddle? Official Guide
This post contains affiliate links. As an Amazon Associate, we earn from qualifying purchases.
You cannot add a separate hood to a standard Blackstone griddle as an aftermarket accessory. On models that include a hood, it is a single, integrated piece with the griddle top, assembled using specific bolts and aligned with pins during initial setup. The process is detailed in the owner’s manual, and strict safety rules govern its use.
That integration is the whole game. The hood isn’t a clip-on cover; it’s a structural part of the cooking appliance, and the manufacturer’s assembly instructions are non-negotiable for safety and warranty.
What follows is a breakdown pulled directly from five different Blackstone owner’s manuals: which bolts go where, the universal safety warnings every manual prints in bold, and why attempting to retrofit a hood onto a hoodless model is a non-starter.
Key Takeaways
- Blackstone hoods are not separate accessories; the hood and griddle top ship as a single, pre-assembled unit on compatible models.
- Assembly requires specific hardware: M6x12 bolts for the 36-inch models and M6x16 screws for the handle on smaller units.
- Every manual states the same critical rule: the hood must be open while cooking. Closing it traps heat and gas, creating a fire hazard.
- The hood is secured by aligning four pins on its underside with corresponding holes in the griddle body, a step that requires a second person.
- Attempting to fabricate or attach a non-OEM hood voids the warranty and violates clear safety standards outlined in the manuals.
The Short Answer: Hoods Are Integrated, Not Add-Ons
If your Blackstone griddle did not come with a hood, you cannot purchase and install an official Blackstone hood later. The company does not sell the hood as a standalone accessory. This isn’t a marketing choice, it’s an engineering and safety one.
On models like the 36-inch Blackstone 2310, the parts list is explicit: item “2.1 Hood” and “2.2 Griddle top” are listed, but the assembly diagram shows them as a single pre-assembled unit. The manual refers to setting the “Griddle top & Hood (1 piece)” onto the body.
The hood and cooking surface are designed as a matched set. The hinge mechanism, the weight distribution, and the clearance for the burners are all calibrated at the factory. A mismatched hood could obstruct vents, trap excessive heat, or destabilize the entire unit.
For models that include a hood, assembly is a defined, step-by-step process in the manual. The question shifts from “can I add one?” to “how do I correctly install the one that came with it?”
The Critical Safety Rules You Cannot Skip
Before you touch a bolt, you need to know the rules. These aren’t suggestions; they are warnings printed in the owner’s manual with DANGER and WARNING headers. Ignoring them risks fire, explosion, or carbon monoxide poisoning.
The most important rule concerns hood operation.
Where this goes sideways: Closing the hood while the burners are on. Every cited manual, for the 17-inch, 22-inch, and 36-inch models, states: “DO NOT leave the hood closed for more than 10 minutes while cooking.” Some are stricter: “The hood MUST be open while the burner is lit.”
The hood is not a lid for baking. It’s a wind guard and a partial heat reflector. Closing it while the propane burners are running traps combustion gases, starves the flame of oxygen, and can cause a dangerous buildup of carbon monoxide or unburned gas. The 10-minute allowance is for quick warming or steaming a dish, not for extended cooking.
Other non-negotiable safety rules directly involve the hood: * If you smell gas: The manual’s first step is to shut off the gas and open the hood to ventilate the area. * Moving the griddle: You must let the appliance cool to 115°F (45°C) before moving it. The hood retains significant heat. * Transport: For portable models like the 1935, the manual advises latching the hood closed before wheeling it to prevent it from swinging open.
These rules exist because a griddle is an open-flame gas appliance. The hood modifies its environment, and that change must be managed.
Model-Specific Assembly: Bolts, Pins, and Handles
If your model includes a hood, assembly is straightforward but precise. The differences between models usually come down to bolt length and the order of steps. Here’s what the manuals specify.
| Blackstone Model | Hood Handle Hardware | Griddle/Hood Attachment | Key Assembly Note |
|---|---|---|---|
| 36″ Model 2310 | Two (2) M6x12 bolts | Align 4 pins to body holes | Hood & griddle top are one pre-assembled piece. |
| 22″ Model 1935 | Two (2) M6x16 screws with grommets | Align 4 pins; secure with two M6x12 bolts | Screws are pre-installed in the handle. |
| 36″ Model 2322 | Two (2) pre-installed M6x16 screws | Align 4 pins to body holes | Uses hood handle bezels. |
| 17″ Model 2143 | Two (2) M6x16 screws pre-installed | Align 4 pins to body holes | Smallest model; same pin alignment principle. |
| 36″ Model 2309 | Two (2) M6x12 bolts | Align pins to body | Cabinet model; hood assembly is identical to other 36″ units. |
The consistent theme across all models is the four-pin alignment. This isn’t a casual placement.
Step-by-Step Pin Alignment (Based on Manual Instructions):
- Get help. The griddle top and hood are heavy and awkward. A second person is essential to avoid dropping it or damaging the pins.
- Position the unit. Place the griddle body on its feet on a stable, level surface. Have your hardware and tools ready.
- Lift and align. Together, lift the combined hood and griddle top. Tilt it to locate the two front pins on its underside. Set these into the corresponding front holes on the griddle body.
- Seat and lock. Once the front pins are seated, push the assembly gently backward. This allows the two rear pins to drop into the rear holes. You should feel it settle into place. On some models, you then push the top forward or backward to lock it.
- Secure the handle. Only after the main unit is seated should you attach the hood handle. Use the specified bolts or screws from your hardware pack. Do not overtighten.
Skipping the pin alignment and trying to just bolt the hood down will misalign the entire piece. The hinge won’t work correctly, and the hood may not sit flush, creating a safety gap.
Common mistake: Attaching the hood handle before setting the griddle top on the body. The handle gets in the way and makes the heavy top harder to grip and align. Do the pins first, handle last.
Why a Universal or Aftermarket Hood Is a Bad Idea
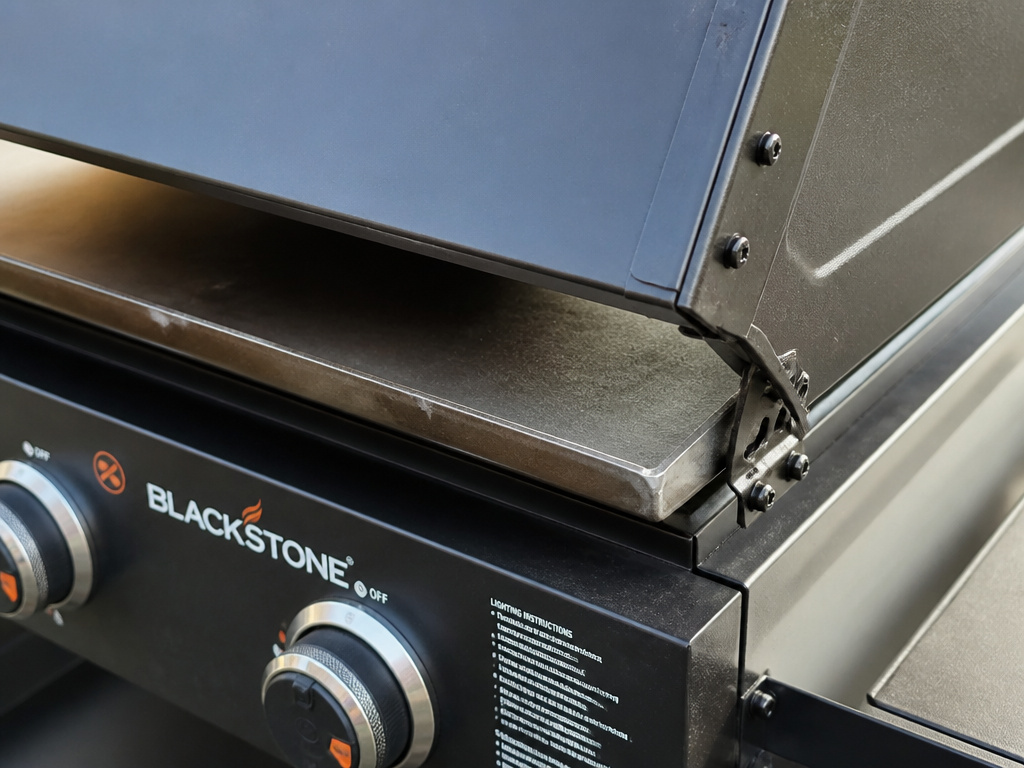
You might see third-party metal shops or DIY forums discussing custom hoods. The argument is usually about cost or availability. The reality is about liability and function.
1. It Voids Your Warranty.
Blackstone’s warranty does not cover damage from unauthorized modifications. Adding a non-OEM part immediately nullifies it. If your burner system fails later, you’ll have no recourse.
2. It Violates Safety Standards.
Griddles must conform to gas appliance codes like ANSI Z223.1/NFPA 54 or CSA B149.1. These standards govern clearance, ventilation, and material ratings. A homemade hood hasn’t been tested to these standards. It could be made from a material that can’t withstand the heat, or it could block the required 36-inch clearance from combustible surfaces.
3. It Won’t Fit or Function Correctly.
The hinge point, the weight, and the internal geometry are specific. An ill-fitting hood can: * Scratch the griddle surface every time you open it. * Trap heat and moisture against the control panel, damaging the ignitors. * Create a backdraft that blows out the burners in a light wind.
The integrated design exists for a reason. Working against it creates problems that didn’t need to exist.
Hood Use and Care: More Than Just a Cover
Once installed, use the hood as intended. It has two primary jobs: blocking wind and retaining some heat for specific tasks.
When to Use the Hood:
- Windy days: A partial hood block prevents the wind from scattering heat across the surface, helping maintain consistent cooking temperatures.
- Melting cheese or steaming: For a short period, under the 10-minute limit, closing the hood can create a steamy environment to melt cheese on burgers or steam vegetables.
- Pre-heating: Closing the hood can help the griddle top reach temperature slightly faster on a cold morning, but you must open it before you begin cooking.
How to Care for It:
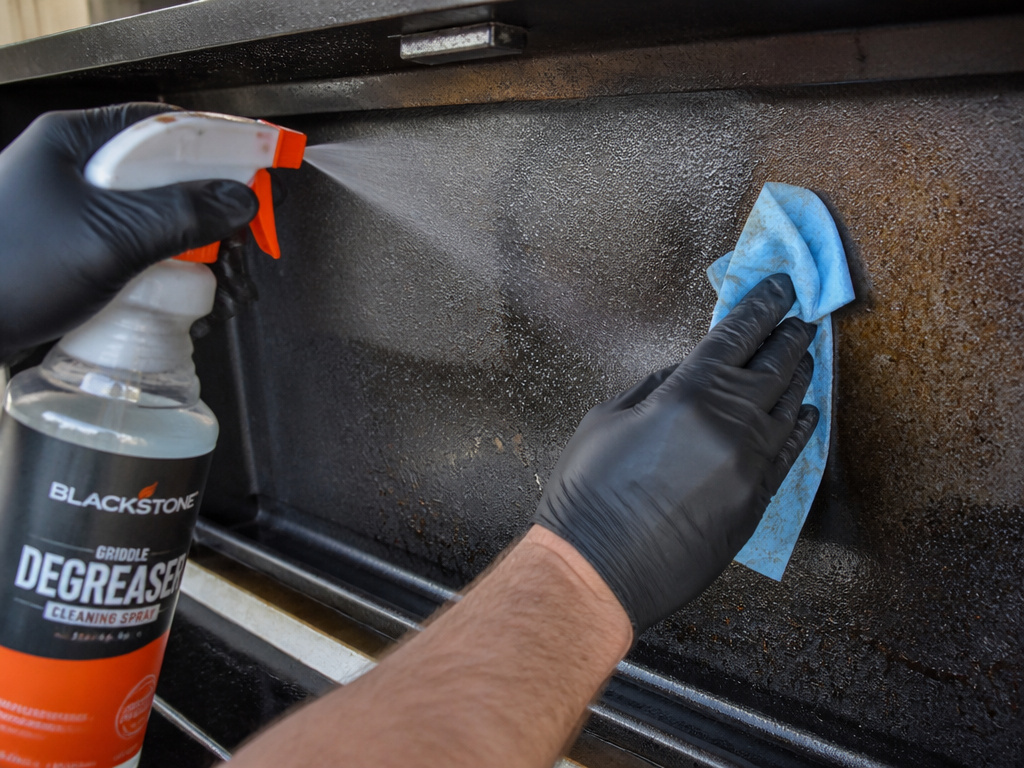
- Cleaning: Clean the inside of the hood with a grill-safe degreaser when grease splatter builds up. This prevents a flammable grease layer from accumulating.
- Seasoning: The hood’s interior is typically the same cold-rolled steel as the griddle. If you notice rust spots, you can apply a thin layer of your best seasoning oil and heat the griddle with the hood closed to season it, following the same process as for the main surface.
- Storage: If storing your griddle outside in winter, ensure the hood is latched or secured. Check the hinge points for moisture buildup when you uncover it in the spring.
Think of the hood as part of the cooking system, not just a lid. Its condition affects your cook.
If You Don’t Have a Hood: Effective Alternatives
For owners of hood-less Blackstone models like the classic Adventure Ready series, you aren’t missing a critical piece. You just need to manage wind and heat differently.
1. Wind Guards.
These are the single most effective griddle accessory for hood-less models. They are lightweight, removable metal panels that attach to the sides of the griddle. They block crosswinds without trapping heat or gases. Many consider them the best accessory you can buy.
2. Strategic Placement.
Position your griddle with a wall, fence, or vehicle blocking the prevailing wind. Even a partial windbreak makes a huge difference in fuel efficiency and temperature control.
3. Cast Iron Dome Covers.
For small-scale steaming or melting, a large, heavy cast iron dome or cloche can be placed over individual items. It localizes the steam without enclosing the entire cooking surface or the burners.
4. Invest in a Complete Griddle Tool Set.
The right tools, a great spatula, scraper, and basting cover, give you more control over the cooking environment than a fixed hood ever could. A comprehensive griddle accessory kit often includes these and more.
The goal is controlled cooking, not necessarily an enclosed one. These alternatives often offer more flexibility than a fixed hood.
Frequently Asked Questions
Can I buy a Blackstone hood separately?
No. Blackstone does not sell the hood as a standalone replacement part. It is only supplied as part of the complete griddle top and hood assembly for specific models.
What is the purpose of the hood on a Blackstone?
The primary purposes are to act as a windbreak for the burners, to retain some heat for short-duration steaming or melting, and to protect the griddle surface when not in use. It is not designed for closed-lid cooking like a barbecue.
Is it safe to close the hood while cooking?
Only for very short periods. The official manual for multiple models states: “DO NOT leave the hood closed for more than 10 minutes while cooking.” For safety, the hood should be fully open whenever the burners are actively in use.
Can I make my own hood for my Blackstone?
It is not recommended and is likely unsafe. A homemade hood would void your warranty, may not meet gas appliance safety standards for material and clearance, and could easily disrupt the air flow to the burners or trap dangerous levels of heat.
Do all Blackstone griddles come with a hood?
No. Many popular models, especially the smaller, portable “Adventure Ready” versions, do not include a hood. Hoods are typically featured on the larger, cart-based 36-inch and 28-inch models. Always check the product specifications before purchasing.
The Bottom Line
The hood question has a clear, manual-backed answer: if your Blackstone didn’t come with one, you can’t add the official version. The integration is factory-sealed. For models that have one, correct installation is a matter of following the diagram, using the right bolts, and respecting the stark safety warnings.
Your energy is better spent on proper seasoning, because the importance of seasoning your griddle far outweighs the benefits of a hood. Focus on mastering your essential accessories, a good wind guard, a solid spatula, and the right cooking oil. That trio will improve your cooking more reliably than any lid ever could.
