
The Correct Way to Season Cast Iron Grill Grates | A Guide
This post contains affiliate links. As an Amazon Associate, we earn from qualifying purchases.
To season cast iron grill grates, you must coat them with a high-smoke-point oil and bake the oil on at 400–450°F for 30–60 minutes. The process polymerizes the oil, creating a hard, non-stick layer that seals the iron from moisture and rust. This is mandatory before first use and should be repeated whenever the surface looks dry or shows rust.
The specific oil and temperature matter because they determine whether the layer bonds correctly or turns gummy. A thin coat of avocado oil at 450°F works. A thick coat of olive oil at 350°F fails. The difference is in the smoke point and the fat’s saturation.
What follows is the breakdown: which grates actually need it, the three oils that work, the one step everyone skips that causes stickiness, and how to tell a good season from a bad one before you even light the grill.
Key Takeaways
- Seasoning is mandatory for bare cast iron but optional for porcelain-coated grates. Coating a porcelain grate with oil before cooking prevents sticking, but the true polymerized seasoning only bonds to exposed iron.
- Use a high-smoke-point, saturated fat. Avocado oil (500°F), rice bran oil (500°F), or vegetable shortening like Crisco are manufacturer-recommended. Avoid olive oil, butter, and non-stick sprays.
- A sticky surface means too much oil. The single most common mistake is applying the oil too thickly. The excess cannot polymerize and remains a gummy residue that attracts food and carbon.
- You can season in your kitchen oven. If your grill’s temperature control is unreliable, use your oven at 400–450°F for one hour. It provides consistent, indirect heat perfect for curing.
- Store oiled grates in a dry place. Before long-term storage, apply a light room-temperature oil coat to grates as a rust-inhibiting barrier, as specified in the Broil King care guide.
What Seasoning Actually Does (And Which Grates Need It)
Seasoning is not a coating you apply. It is a chemical change you cause. When a thin layer of oil is heated past its smoke point, its molecules cross-link and bond to the iron’s microscopic pores. This creates a hard, slick layer of polymerized oil.
This polymerized layer serves two mechanical purposes: it fills the porous surface of the iron to prevent food from mechanically locking on, and it acts as a physical barrier that blocks oxygen and water from contacting the raw metal, which is what starts the oxidation process we call rust.
A well-seasoned grate looks dark gray to black, feels smooth to the touch, and has a slight satin sheen. A poorly seasoned or bare grate looks metallic silver and feels rough.
Bare Cast Iron vs. Porcelain-Coated Grates
This is the first decision point. Treating them the same leads to chipping and confusion.
| Grate Type | Needs Polymerized Seasoning? | Primary Care Goal | Risk If Mis-treated |
|---|---|---|---|
| Bare Cast Iron | Yes, before first use and after any deep clean. | Build and maintain the polymerized oil layer. | Rust forms on any uncoated spot within days in humid conditions. |
| Porcelain-Coated | No. The porcelain glaze is the non-stick layer. | Protect the glaze from chipping and keep it clean. | Chips expose the iron underneath, which will rust and spread under the coating. |
Porcelain-coated grates, like those from Coleman’s Flare-Free series, have a vitreous enamel glaze fused to the iron at the factory. You cannot season glaze. The manual for these grates still says to “oil lightly before use,” but that’s for food release, not for building a bonded layer. If the coating chips, you must sand the exposed iron smooth and season only that spot to stop rust.
Bare cast iron grates have no such protection. Every manufacturer—Broil King, Napoleon, Big John—states that seasoning is required before first use. It is the only line of defense.
The 3-Step Cast Iron Grate Seasoning Process
Follow these steps for new grates or for a full re-seasoning after rust removal. The goal is a thin, even, fully polymerized coat.
Before you start: The grill or oven will be at 400–450°F for up to an hour. Wear heat-resistant gloves. Ensure your grill is on a stable, non-flammable surface outdoors, or that your kitchen oven is clean and well-ventilated.
Step 1: Clean and Dry Completely
This step is non-negotiable. Any residue or moisture sabotages the bond.
- Wash new grates with warm water and a mild detergent to remove factory oils and dust. Do not put them in a dishwasher.
- Scrub existing grates with a stiff brush to remove loose carbon and debris. For heavy buildup, perform a 15-minute burn-off on your grill’s highest setting first.
- Dry immediately and thoroughly. Use a towel, then place the grates near a warm grill or in a low-warm oven for 5-10 minutes to evaporate all residual moisture. Iron holds water you cannot see.
Where this goes sideways: Letting grates “air dry.” Cast iron does not dry quickly. Unseen moisture turns to steam during heating, causing the oil to bead up and creating a spotty, weak seasoning layer that flakes within a few cooks.
Step 2: Apply a Thin Coat of the Right Oil
The keyword is thin. You are wiping oil on, then wiping almost all of it off.
- Tool: Use a silicone basting brush, an oil mister, or a paper towel. A mister gives the most control.
- Method: Apply a small amount of oil to the cold grate. Spread it over the entire surface—top, bottom, sides, and ends of every rod. Then, take a fresh paper towel and buff the grate aggressively. Your goal is to leave only a faint, almost invisible sheen. If the grate looks wet or shiny, you have used too much.
This is the mistake that creates a sticky skillet or grate. Excess oil cannot fully polymerize; it partially cooks into a thick, gummy varnish. That gunk attracts carbon and food, making your next cook a mess.
Step 3: Bake the Oil On
You are now curing the oil, not cooking on it.
- On Your Grill: Place the oiled grates in a cold grill. Preheat to Med/Low (400°F / 200°C). Close the lid and bake for 30 minutes (per Broil King) to 1 hour (per Big John Grills). You will see smoke—this is normal and indicates polymerization.
- In Your Oven: This is often more reliable. Place grates on the middle rack with a sheet of aluminum foil on the rack below to catch drips. Preheat to 400–450°F. Bake for 1 hour. Turn the oven off and let the grates cool completely inside.
I prefer the oven for a full re-season. Grill burners heat from below, which can lead to uneven curing on the top side of the grate. The oven’s ambient heat treats every surface equally, giving a more durable coat.
After cooling, the grate should have a darker, matte finish. It is now ready for use or for a second coat if you desire a thicker seasoning base.
Oils and Fats: What Works, What Doesn’t
The best oil for seasoning has a high smoke point and a high level of saturated fats. Saturated fats polymerize more readily and form a harder finish.
| Recommended (Use These) | Smoke Point | Why It Works |
|---|---|---|
| Avocado Oil | 500°F (260°C) | Very high smoke point, neutral flavor, excellent polymerization. |
| Rice Bran Oil | 500°F (255°C) | Similarly high smoke point, widely recommended in OEM guides. |
| Vegetable Shortening (Crisco) | ~360°F (182°C) | High in saturated fat, bonds well, inexpensive. A classic choice. |
| Canola Oil | 400°F (204°C) | Accessible, affordable, and explicitly listed in the Coleman manual. |
| Avoid (These Fail) | Reason |
|---|---|
| Olive Oil | Low smoke point (325–375°F). It burns off before polymerizing, leaving a weak, carbonized layer. The Coleman manual explicitly forbids it. |
| Butter or Margarine | Contains salt, milk solids, and water. These burn and create a spotty, flaky coating. |
| Non-Stick Cooking Spray | Often contains lecithin and propellants that leave a gummy residue. It burns off at low heat. |
| Flaxseed Oil | While it creates a hard coat, it is notoriously brittle and prone to flaking in the high-heat, scraping environment of a grill. |
The choosing an oil decision is simple: pick the highest smoke point oil you have on hand. Avocado and rice bran are ideal. Canola and vegetable shortening are proven, effective defaults.
Maintaining and Restoring Your Season
Seasoning is not permanent. It wears down with scraping, acidic foods, and improper cleaning grill grates. Maintenance is easier than a full restore.
After-Cook Maintenance
This is the habit that extends the life of your grill seasoning indefinitely.
- While the grill is still hot, brush off food debris.
- For a bare cast iron grate, apply a micro-thin coat of oil with a folded paper towel while the grate is warm (not scorching hot). The residual heat will begin to cure it.
- For a porcelain-coated grate, simply brush it clean. You can oil it lightly before the next cook if you wish.
This continual proper maintenance builds the seasoning in layers, like a ceramic shell.
Dealing with Rust
Rust happens. It is not a death sentence.
Common mistake: Seasoning over rust. The oil will polymerize over the rust, trapping moisture against the metal. The rust continues to spread underneath, and the seasoning will eventually bubble and flake off in sheets.
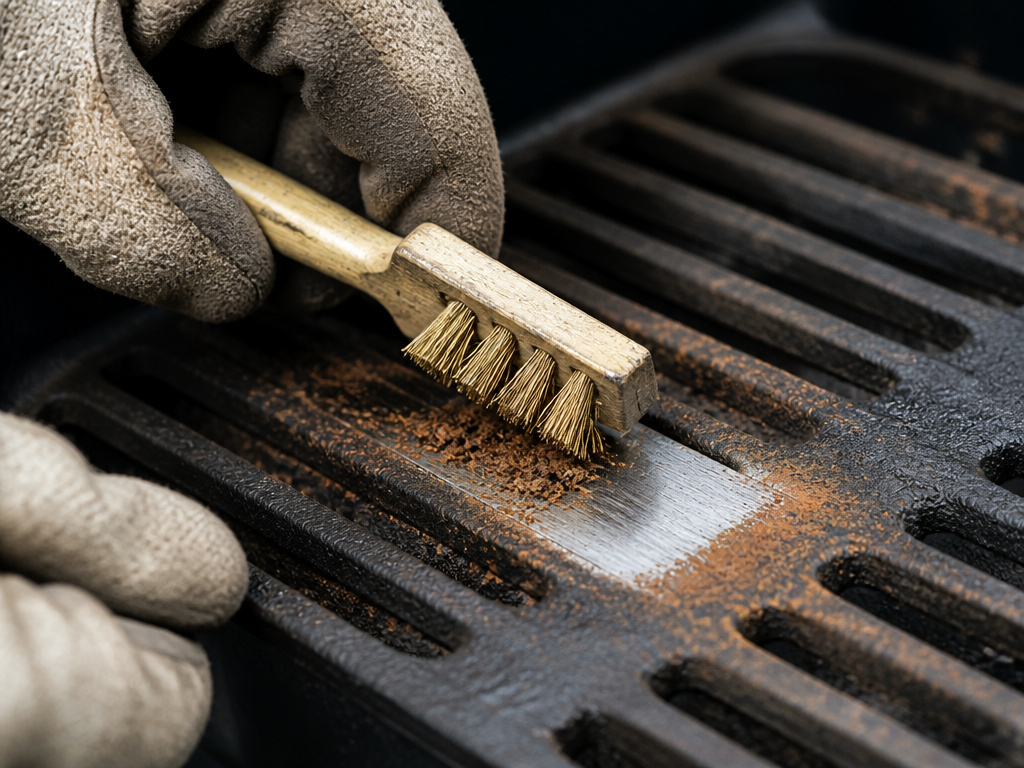
If you see red rust, you must remove it first. Use a brass brush or sandpaper (as Big John Grills instructs) to scrub the spot back to bare, shiny metal. Wipe away all dust. Then, re-season that specific spot following the full 3-step process. You are now maintaining cast iron, not just covering up neglect.
The Sticky or Gummy Grate Problem
A tacky surface is the hallmark of too much oil. The fix is not more seasoning.
- Heat the grate to about 200°F—warm to the touch but not smoking.
- Wipe it vigorously with several dry paper towels or a clean cotton rag. The heat will soften the gummy oil, allowing you to wipe a surprising amount away.
- If stickiness remains, scrub gently with a paste of coarse salt and a drop of water, then rinse and dry completely.
- Re-apply a vanishingly thin coat of oil and re-cure at proper temperature.
This issue is identical to a sticky cast iron skillet and has the same root cause and solution.
Frequently Asked Questions
Can you season cast iron grill grates in the oven?
Yes, and for a first-time season or major restore, the oven is often superior. It provides consistent, ambient heat at a stable temperature (400–450°F) for one hour. This ensures even polymerization on all sides of the grate, unlike a grill’s directional heat. Always place foil on a rack below to catch drips.
How often should you re-season grill grates?
Re-season bare cast iron grates whenever the surface looks dry, gray, or matte, or at the first sign of rust. For most frequent users, a quick touch-up with oil after each grilling session is enough. A full re-seasoning might only be needed once or twice a grilling season. Napoleon recommends re-seasoning every 3-4 uses for a like-new finish.
Can you use soap on cast iron grill grates?
Yes, you can use a mild soap for a deep clean. The old rule was a myth; modern dish soaps do not contain lye, which is what strips seasoning. The real enemy is soaking. Never let cast iron soak in water. Wash with soap, scrub, rinse immediately, and dry thoroughly. Then apply a light oil coat. Our guide on using soap on skillets covers this in detail.
What’s the difference between seasoning and just oiling before cooking?
Seasoning creates a permanent, bonded polymer layer. Oiling before cooking is a temporary application to prevent food from sticking during that single cook. For a porcelain-coated grate, you only need to oil before cooking. For a bare cast iron grate, you should do both: maintain the permanent seasoning and use a light oil coat for each session.
Why did my seasoning flake off?
Flaking usually indicates a weak foundation. Common causes are: seasoning over rust or carbon buildup, using an oil with additives (like non-stick spray), or applying the oil too thickly in multiple layers without proper curing in between. Strip the flaking areas with a brush, ensure the metal is clean and dry, and re-season with a proper thin coat of a high-smoke-point oil.
Before You Go
Seasoning cast iron grill grates is a simple chemical process disguised as kitchen lore. The rules are few but non-negotiable: start with a bone-dry grate, use a high-smoke-point oil, apply it thinner than you think possible, and cure it at a steady, high heat.
Forget the myths about soap and elaborate rituals. Focus on the mechanism. The oil needs heat and air to transform into a plastic-like shield. Your job is to set the stage and then let chemistry work.
The default method for a guaranteed result is the oven at 450°F for an hour with avocado oil. That combination hits every manufacturer spec. For ongoing care, a quick brush and a whisper of oil after each use will keep that black, slick patina intact for years. When in doubt, apply less oil, not more. That’s the whole secret.
