
How Does a Steamer Work | The Physics and Three Main Types
This post contains affiliate links. As an Amazon Associate, we earn from qualifying purchases.
A steamer works by surrounding food with a controlled environment of hot, saturated water vapor (steam). The steam transfers its latent heat of vaporization directly to the food’s surface, cooking it quickly and evenly without submerging it in water. This method preserves moisture, nutrients, and texture better than boiling.
That latent heat is the key. It takes a massive amount of energy to turn liquid water into vapor. When that vapor touches cooler food, it condenses back into water and releases all that stored energy right onto the surface. The result is a more efficient and gentler cook than boiling water could ever deliver.
What follows is a breakdown of the physics, a tour of the three main machine types you’ll find in kitchens, and the non-negotiable maintenance rule that keeps them all running. By the end, you’ll know exactly what happens inside the box when you press start.
Key Takeaways
- Steam cooks via latent heat transfer, releasing a huge amount of energy directly onto food as vapor condenses, which is faster and gentler than boiling.
- Commercial kitchens use boilerless, pressure, or convection steamers, each with different mechanisms for generating and circulating steam.
- Water quality is a warranty item for many manufacturers; hard water leads to limescale that insulates heating elements and kills efficiency within months.
- A proper steamer drain must be vented to atmosphere; connecting it directly to a sewer line creates backpressure that forces steam leaks at the door seal.
- For home use, a simple steamer basket inside a lidded pot leverages the same physics as a $5,000 commercial unit.
The Core Physics: Why Steam Cooks Food
Forget the appliance for a minute. The magic happens in the phase change.
Steam cooking transfers heat through the condensation of saturated water vapor. When steam at 212°F (100°C) contacts cooler food, it condenses into liquid water, releasing approximately 970 BTUs per pound of steam, the latent heat of vaporization, directly onto the food’s surface.
Boiling water only ever reaches 212°F. The food cooks by conduction, relying on the water molecules physically touching it and slowly transferring heat. It’s a sluggish process. Steam, however, packs that extra 970 BTUs of latent energy into every pound. The moment condensation starts, that energy dumps into the food.
This is why vegetables stay crisper and brighter. The cook is so rapid that cell walls don’t have time to break down and leach color and nutrients into a water bath. Proteins like fish and chicken cook evenly because the entire surface is bathed in a consistent 212°F environment. There are no hot spots.
The condensation effect also bastes the food in its own juices, creating a microenvironment of moisture. That’s the opposite of oven roasting, which actively dries the surface.
The Three Main Steamer Architectures
Not all steamers are built the same. The mechanism for making and managing steam splits into three clear categories, each with trade-offs for speed, capacity, and cost.
1. Boilerless (or “Generatorless”) Steamers
This is the modern workhorse for most commercial kitchens. The name is a bit misleading, it still makes steam, it just doesn’t use a traditional, standalone boiler.
A boilerless steamer has a sealed cooking cavity with electric heating elements or gas burners built directly into its floor. A small reservoir of water sits in a trough or tank at the bottom. When activated, the heaters bring that small volume of water to a rapid boil, filling the cavity with steam almost instantly. A fan (in a convection model) then circulates the steam for even cooking.
Why-Layer: Eliminating the separate boiler reduces standby energy loss and slashes heat-up time from 20-30 minutes down to 4-5 minutes. The Southbend StratoSteam electric countertop model hits cooking temperature in about 4 minutes on a cold start because its heating cartridges are integrated into the cavity’s bottom plate.
| Feature | Boilerless Steamer | Traditional Pressure Steamer |
|---|---|---|
| Heat-Up Time | 4–5 minutes (cold) | 20–30 minutes |
| Water Use | Low (heats only what’s needed) | High (maintains a full boiler) |
| Footprint | Compact | Large, needs boiler clearance |
| Best For | Quick turnover, à la carte service | High-volume batch cooking |
Where this goes sideways: Connecting the drain line directly to a building drain. This creates a closed system. Without a vent to the atmosphere, backpressure builds in the cavity during steaming. The pressure seeks the weakest point, usually the door gasket, and you’ll get a steady leak of steam and water onto the floor. The Groen manual states this outright: improper drain connection voids the warranty.
2. Pressure Steamers
These are the powerhouses for institutional cooking. They work like a pressure cooker on a grand scale. A separate, pressurized boiler heats water to produce steam above 212°F (often around 240°F). This superheated steam is then piped into the cooking compartment.
The higher temperature cooks food significantly faster. A batch of potatoes that takes 20 minutes in a boilerless unit might be done in 10-12 minutes under pressure. The trade-off is complexity, cost, and a mandatory safety shutdown cycle.
Why-Layer: The pressure allows the steam temperature to exceed water’s normal boiling point. However, minerals in the water concentrate in the boiler over time. To manage this, the boiler must be purged. One pressure steamer manual mandates shutting off the power switch for at least 3 minutes every 8 hours to trigger an automatic drain of mineral-heavy water, a non-negotiable step to prevent rapid scale buildup.
3. Countertop & Home Appliance Steamers
This category includes everything from dedicated food steamers to combo oven units. The principles remain the same, but the execution is simplified.
- Dedicated Food Steamers: Like the Russell Hobbs model, these have a base unit with a heating element and water reservoir. Stackable baskets sit above. The element boils the water, and the steam rises naturally through the baskets. They are simple but effective for vegetables, dumplings, and fish.
- Steam Ovens: Higher-end models, like those from Miele, inject steam into a sealed oven cavity. This allows for combination cooking (steam + convection heat) and precise humidity control. The steam is typically generated by a small internal boiler or an instantaneous flash-heat system.
- The Stovetop Method: A steamer basket placed inside a lidded pot is a perfect, low-tech example of boilerless steaming. The boiling water below generates the steam, and the lid contains it, creating a mini steam cavity. It’s the most accessible way to harness the physics.
Critical Components and What They Do
Every steamer, from a commercial giant to a bamboo steamer, relies on a few key parts working together.
- Water Reservoir/Supply: The source. It can be a manual-fill tank, a connected water line, or just the water in your pot. If the line is connected, it must be cold water. Hot water supply lines can contain higher dissolved mineral levels that precipitate out faster as scale.
- Heating Element: The engine. This boils the water. In commercial units, it’s often a metal-sheathed electric cartridge or a gas burner. Failure here usually means scale insulation.
- Cooking Cavity: The sealed box where the food sits. It must be well-insulated and have a tight-sealing door or lid to contain the steam and pressure.
- Steam Circulation System (Optional): A fan, like the side-mounted convection fan in the Groen GSSP-BL, moves steam around to eliminate cold spots and cook food uniformly. This is a major upgrade over passive steam rise.
- Drain: The essential exit. It removes condensate (spent steam that has cooled back to water). This drain line must be vented and use piping rated for boiling water. Plastic pipes will melt.
Common mistake: Using any cleaning agent with chlorides or sulfamic acid. The Groen manual explicitly warns against cleaners containing hydrochloric acid or more than 30% phosphoric acid. These acids can corrode stainless steel welds and components, leading to pinhole leaks and catastrophic failure. Mild, food-safe cleaners only.
Water Quality Isn’t Optional
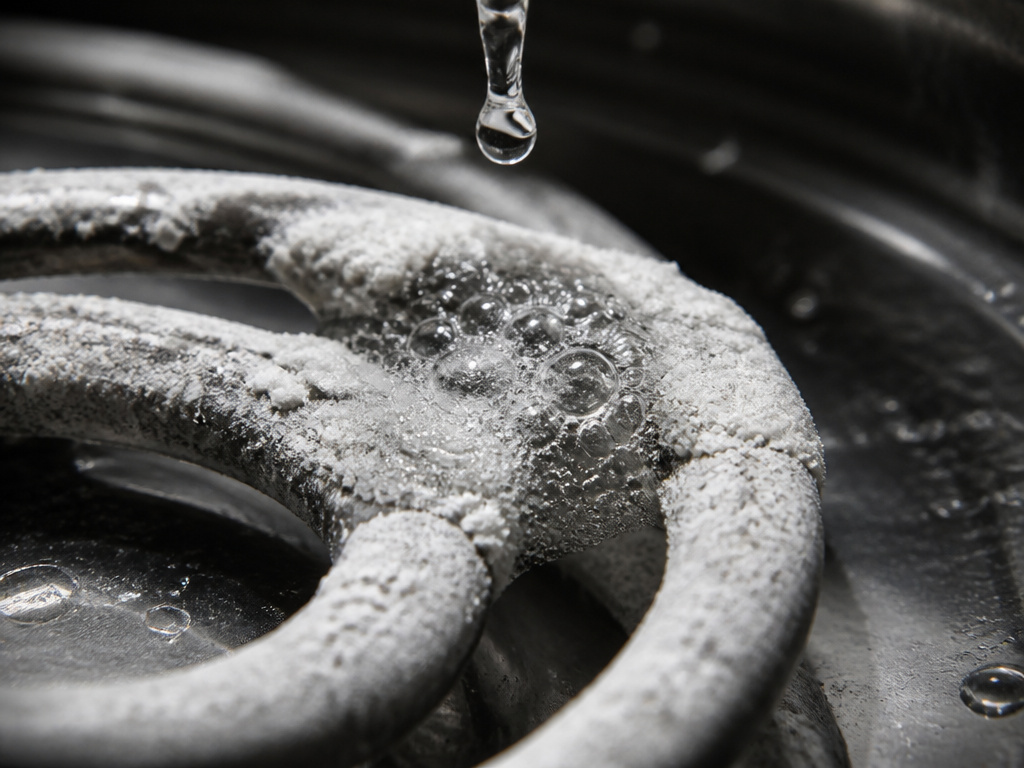 This is the single biggest point of failure for owned equipment. Steamers are essentially kettles that run for hours a day. The mineral content of your water decides its lifespan.
Manufacturers specify water requirements to keep their warranties valid. The Southbend StratoSteam manual, for example, calls for water with a pH of 7.0–7.5 and a hardness of 2 grains (35 PPM) or less. Water harder than that will deposit limescale (calcium carbonate) on heating elements and sensors.
Why-Layer: Scale acts as an insulator. A coated heating element must work harder and longer to transfer the same amount of heat, leading to higher energy bills and eventual element burnout. In a boiler system, scale can flake off and clog water valves and drains. The fix is regular descaling with a citric acid or vinegar solution, a process outlined in most home steamer manuals every 3 months.
Steamer vs. Boiling: A Direct Comparison
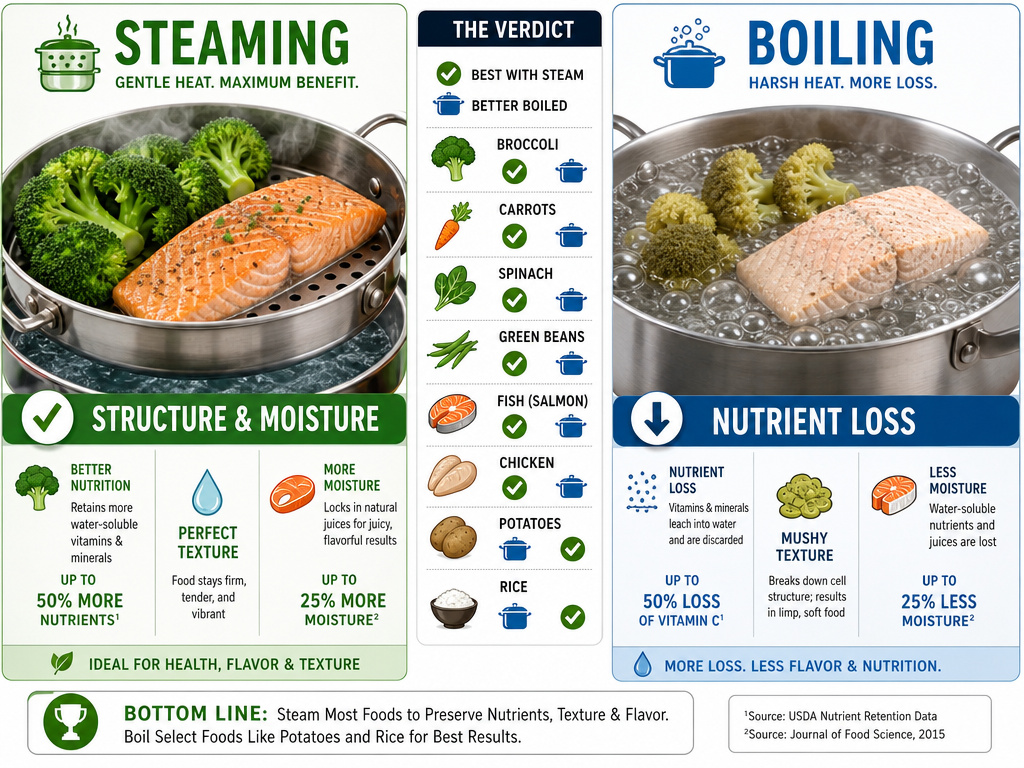 When should you steam instead of boil? The answer lives in the texture and integrity of the food.
| Food Type | Result with Steaming | Result with Boiling | Verdict |
|---|---|---|---|
| Broccoli Florets | Vibrant green, crisp-tender, holds shape. | Often olive-drab, mushy, nutrients leach into water. | Steam wins. |
| Salmon Fillet | Moist, evenly opaque, delicate flavor preserved. | Can be tough, dry, and flavorless as oils leach out. | Steam wins. |
| Potatoes (for mash) | Cooks evenly, retains more natural flavor. | Can become waterlogged, diluting flavor. | Steam wins. |
| Pasta | Not possible—requires immersion for starch hydration. | The only correct method. | Boil wins. |
| Eggs | Possible but finicky; not standard. | Reliable and easy. | Boil wins. |
The pattern is clear. For delicate foods where structure, moisture, and nutrient retention are priorities, steaming is the superior technique. For foods that need hydration or where water contact is part of the chemistry (like pasta or beans), boiling is necessary.
Choosing and Using a Home Steamer
You don’t need a commercial setup. Start with the right tool for your actual habits.
If you steam vegetables twice a week, a simple stainless steel steamer basket is the most versatile and storage-friendly choice. It goes in any pot you own. For a family that loves foods to steam like dumplings, fish, and veggies daily, a dedicated electric food steamer with multiple tiers (like a Hamilton Beach or Oster model) is worth the counter space. For the serious cook who wants precision, a combi-steam oven is the ultimate upgrade.
Always preheat. Whether it’s a commercial unit needing 4 minutes or a home pot waiting for the water to boil, let the cavity fill with steam before adding food. This prevents a temperature drop that leads to uneven cooking and sogginess from excess condensation dripping onto the food.
And always cover the steamer. The lid is what builds the saturated steam environment. Peeking is allowed, but do it quickly, every second the lid is off, you’re releasing the cooking medium.
Frequently Asked Questions
How long does a steamer take to heat up?
It depends entirely on the type. A commercial boilerless steamer takes about 4-5 minutes. A traditional pressure steamer with a large boiler can take 20-30 minutes. A home electric steamer might need 10-12 minutes to produce steam from a cold start, like the Wagner 725 Power Steamer.
Can you steam without a dedicated steamer?
Absolutely. The steamer alternatives are numerous. A metal colander set over a pot of boiling water, a plate elevated on mason jar rings, or even a bundle of vegetables wrapped in parchment paper (en papillote) all work on the same principle.
Do you need to add seasoning to steamed food?
Yes. Steam carries heat, not flavor. Season the food itself before steaming, or make a sauce to accompany it. The clean taste of steamed vegetables is a perfect canvas for herbs, citrus, butter, or a drizzle of good olive oil.
Why is my steamer not producing enough steam?
The most common culprits are a low water level in the reservoir, a clogged water inlet valve (in connected models), or, most frequently, a heavy buildup of limescale on the heating element. Descaling is the first step in troubleshooting.
How often should I clean my steamer?
Wipe out the cooking cavity after every use to prevent bacterial growth and odors. A full descaling cycle should be performed according to your water hardness, for most, every 3 months is a good rule. Follow the manufacturer’s guide for the proper way to clean a steamer.
The Bottom Line
A steamer works by mastering a simple phase change: liquid to vapor and back again, harnessing the latent heat in between. That process is consistent whether it’s happening in a $30 pot insert or a $3,000 commercial cabinet. The machine around it just automates and optimizes the environment.
For home cooking, start with a basket. Learn what steamer recipes you love. If you outgrow it, then consider an appliance. But never forget the core rule that keeps any steamer alive: feed it soft water, respect its drain, and keep it clean. Do that, and it will deliver perfect, gentle cooks for years.
