
Dutch Oven Frying: Your Safety Guide and Best Method Tips
This post contains affiliate links. As an Amazon Associate, we earn from qualifying purchases.
You can fry in a Dutch oven, but it’s a three-part check: the material (enameled or seasoned cast iron), the heat source (stovetop or outdoor fuel, never an electric base), and a strict no-dry-heating rule. A 6-quart Dutch oven with at least 3 inches of oil, heated slowly to 350–400°F, works. Ignore any one of those three, and you risk damaging the pot or starting a fire.
The material check is the whole game. An enameled Dutch oven from Staub handles medium-high frying heat just fine. Le Creuset’s official stance is a “no” because of potential enamel discoloration, a cosmetic, not structural, warning. Bare cast iron works if it’s well-seasoned, but the USDA specifically advises against it for deep frying because it breaks down oil faster than other metals. That’s a food safety note, not a cookware durability one.
What follows: the three rules that make frying safe, a step-by-step method that accounts for your specific Dutch oven type, and the exact scenarios where you should use a different pot entirely.
Key Takeaways
- Check your manual first. Electric base units like the All-Clad Dutch Oven Slow Cooker forbid frying. Nonstick models like the Hawkins Die-Cast have a strict 7-minute pre-heat limit with oil.
- Never dry-heat the pot. Always have at least a quarter cup of oil or other liquid in the Dutch oven before applying heat, or you risk cracking enamel or warping thin metals.
- Depth and patience are mandatory. You need a pot at least 5 inches deep (a 6-quart Dutch oven is ideal) with 3–4 inches of oil, heated slowly over 10 minutes to reach 350°F.
- Staub says yes, Le Creuset says maybe. Staub explicitly approves frying. Le Creuset warns against it for cosmetic reasons, but many users do it without functional damage.
- Bare cast iron has a trade-off. While durable, the USDA notes cast iron degrades frying oil faster than aluminum or stainless steel, which can affect food quality over multiple batches.
The 3 Non-Negotiable Rules for Dutch Oven Frying
Dry heating may damage the pan. Do not dry heat the Dutch Oven, that is, never heat the pan without food or water in it. Limit pre-heating… On Medium heat… To no more than 7 minutes. . Hawkins Die-Cast Dutch Oven Instruction Manual
That manufacturer warning isn’t just legal fine print. It’s the consequence of thermal shock. Enamel, a glass coating, and cast iron, a brittle metal, expand at different rates. An empty spot on the bottom can spike 100 degrees hotter than the sides in seconds. The result is a spiderweb crack in the enamel or a permanent warp in the pan’s base. Your first rule is to always have a heat buffer, oil, water, food, in the pot before the burner clicks on.
Your second rule is source verification. Is your Dutch oven just the pot, or is it an appliance? The manual for the All-Clad Dutch Oven Slow Cooker states: “Do not use the cast iron pot for deep frying while inside of the electrical unit.” The heating element in an electric base cannot handle the intense, sustained draw needed to maintain 375°F in a gallon of oil. It will overheat, error out, or fail. If your Dutch oven has a plug, frying is off the table.
The third rule is capacity. Frying isn’t shallow sautéing. You need enough oil to fully submerge food so it cooks evenly and doesn’t stick. A pot needs to be at least 5 inches deep. A standard 6-quart Dutch oven is the practical minimum, holding 4 to 6 cups of oil to achieve a 3-inch depth. Anything smaller, and you’re shallow-frying, which is a different technique with more splatter and less consistent results.
Where this goes sideways: Assuming all “Dutch ovens” are the same. A camping Dutch oven, an enameled home model, and an electric slow-cooker Dutch oven have completely different frying rules. Using the wrong one voids warranties and creates safety hazards.
Material Matters: Enameled vs. Bare Cast Iron
This is where manufacturer advice splits. Staub openly says their enameled Dutch ovens can fry at medium-high heat. Le Creuset advises against it, citing potential enamel discoloration from high-heat polymerized oil. That’s a cosmetic issue, a brownish tint on light-colored enamel, not a sign the pot is damaged. Many home cooks fry in Le Creuset for years without structural problems. The stance difference is about brand risk management, not a fundamental flaw.
Bare cast iron is a different calculation. It’s certainly durable enough for high heat. The catch comes from the USDA deep fat frying guide, which recommends avoiding cast iron because it “breaks down oil faster than other metals.” The porous, reactive surface of cast iron accelerates oil oxidation. Your oil will smoke sooner and develop off-flavors more quickly than in an enameled or stainless steel pot. If you’re frying one batch of chicken, it’s fine. If you’re planning to reuse oil for multiple frying sessions, a cast iron pot is the wrong tool.
| Dutch Oven Type | Frying Suitability | Key Limitation | Best For |
|---|---|---|---|
| Enameled Cast Iron (e.g., Staub, Le Creuset) | Yes, with medium heat | Possible enamel discoloration over time | Occasional home frying, where appearance isn’t a priority |
| Bare Cast Iron (Well-Seasoned) | Conditional Yes | Degrades oil faster; not ideal for oil reuse | Single-batch frying, outdoor/campfire use |
| Die-Cast Nonstick (e.g., Hawkins) | Yes, with strict limits | 7-minute max pre-heat; no high heat | Low-to-medium temp frying, with close thermometer monitoring |
| Electric Base Unit (e.g., All-Clad Slow Cooker) | No | Internal electronics not rated for high-temperature frying | Slow cooking, sautéing only |
For most home cooks, an enameled Dutch oven is the safe, middle-ground choice. It provides a non-reactive surface that doesn’t ruin oil, and it’s easy to clean. Just accept that the interior might develop a patina.
Heat Source and Temperature Control
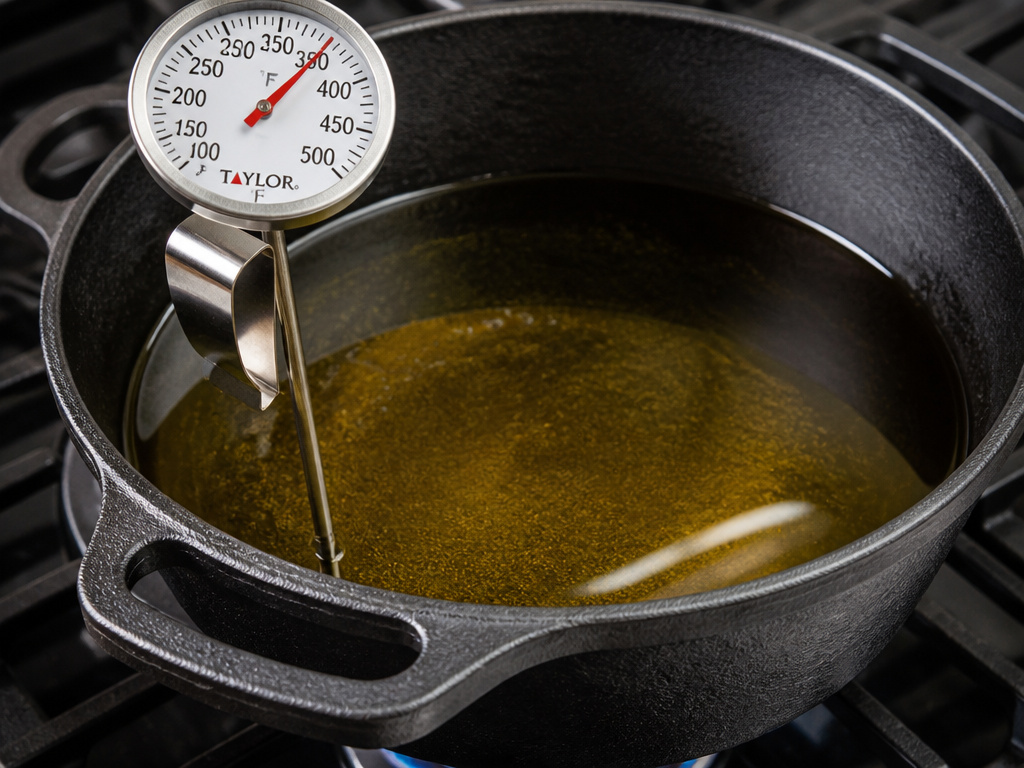
You have the right pot. Now you need the right fire. Frying demands precise, steady heat between 350°F and 375°F. A flickering gas flame or an uneven electric coil is your enemy.
On a home stovetop, medium heat is your baseline. The Hawkins manual specifies “Medium heat of a Big burner of Gas stove” for pre-heating. The goal is to bring the oil up to temperature slowly over 8–10 minutes. Cranking the burner to high will overheat the bottom layers of oil while the top remains cool, causing food to stick and burn. It also risks exceeding the thermal limits of your pot’s material.
Common mistake: Guessing the oil temperature. A single layer of bread sinking to the bottom means nothing. You need a clip-on deep-fry thermometer. Its probe should sit in the center of the oil, not touching the pot’s bottom. That’s the only way to know you’re at 350°F, not 300°F or 400°F.
For outdoor frying, charcoal is the gold standard for control. The Montana Extension heating guide provides a reliable formula: for a 12-inch Dutch oven, use 15 briquettes on top and 9 underneath to maintain roughly 325°F. For frying, you’d shift more coals underneath, around 12–14 bottom and 8 top for a 12-inch oven, to directly heat the oil. Wind is your biggest problem outdoors; it fans coals and creates hot spots. Use a windbreak and rotate the pot a quarter turn every 10 minutes.
Induction cooktops are excellent for frying if your Dutch oven is compatible. They deliver instant, responsive heat. Check your pot’s base; if a magnet sticks firmly, it’s induction-ready. The even heating minimizes hot spots. Just remember the “no dry heating” rule is even more critical on induction, as the heat transfer is extremely direct and efficient.
Step-by-Step: How to Fry in a Dutch Oven
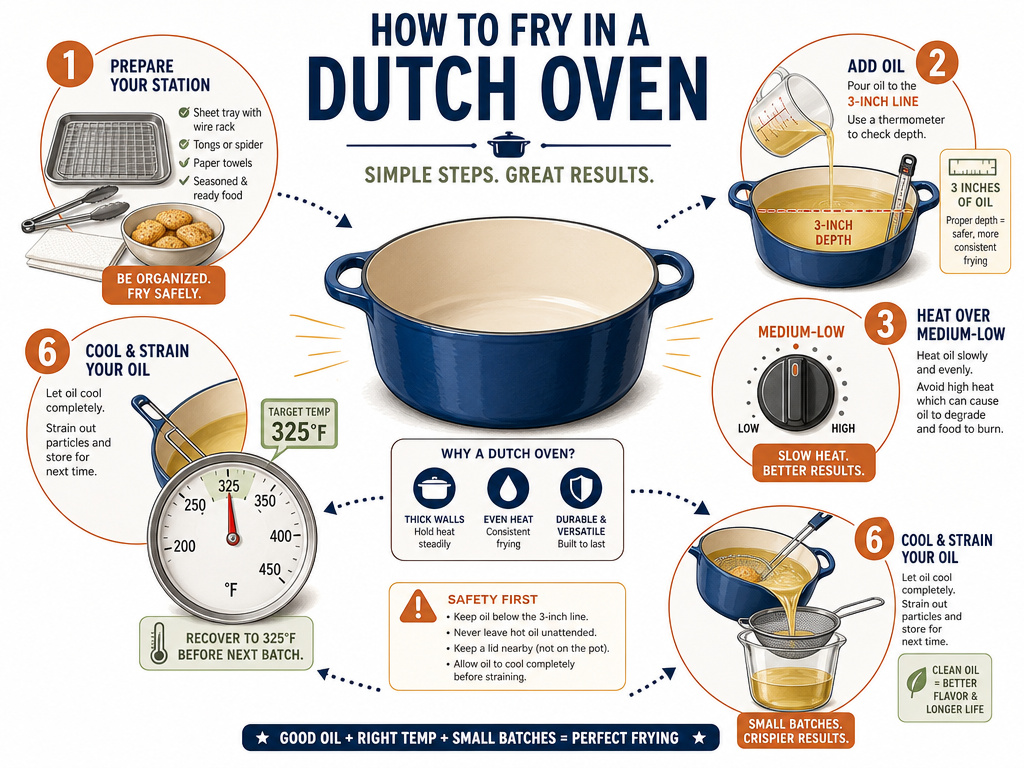
This process assumes a standard, stovetop-safe enameled Dutch oven of at least 6 quarts. If you’re using bare cast iron or a nonstick model, adjust the initial heat down slightly.
1. Prep Your Station.
Clear the surrounding counters. Have a sheet tray lined with paper towels or a cooling rack ready. Keep a large lid and a fire-rated oven mitt within arm’s reach. Never leave hot oil unattended.
2. Add Oil and Thermometer.
Pour in enough neutral, high-smoke-point oil (like peanut, canola, or vegetable) to reach a 3-inch depth. For a 6-quart pot, this is typically 4–6 cups. Clip your deep-fry thermometer to the side, ensuring the probe is immersed but not touching the bottom.
3. Apply Low-to-Medium Heat.
Turn your burner to medium-low. Let the oil heat slowly. This should take 8–12 minutes to reach 350°F. This slow ramp-up is how you prevent scorching and ensure even heat distribution through all the oil, not just the bottom.
4. Fry in Small Batches.
Pat your food completely dry. Moisture causes violent oil splatter. Gently lower food into the oil, filling no more than one-third of the pot’s surface area. Overcrowding drops the oil temperature drastically, leading to greasy, soggy results.
5. Monitor and Recover.
The temperature will drop when you add food. Let it recover to within 25 degrees of your target (e.g., 325°F) before adding the next batch. This patience is what separates crisp fried chicken from oily fried chicken.
6. Cool Oil Completely Before Disposal.
Turn off the heat. Let the oil cool in the pot for at least 3 hours. Once completely cool, strain it through a fine mesh sieve or cheesecloth into a sealed container for disposal or limited reuse. Never pour hot oil down the drain.
When Not to Use a Dutch Oven for Frying
The Dutch oven is versatile, but it’s not a dedicated deep fryer. Recognize the losing scenarios.
Don’t fry in an electric base unit. This bears repeating. The All-Clad manual is explicit. The internal heating element and thermostat are not designed for the thermal load of a full pot of oil. You risk breaking the appliance and voiding the warranty.
Don’t fry large quantities continuously. A Dutch oven’s great heat retention becomes a liability here. After multiple batches, the entire pot, walls and lid, becomes searingly hot, making it dangerous to handle and slowing the oil’s recovery time between batches. For a big fry job, a lighter, thinner-walled stockpot is actually better.
Don’t fry if your pot is chipped or cracked. Any breach in the enamel of an enameled Dutch oven exposes the underlying cast iron to moisture and oil, leading to rust. A crack can also spread under thermal stress when frying. Retire the pot for oven-braising or bread baking instead.
Skip this if: You only have a small (under 5-quart) Dutch oven. The oil depth will be too shallow, leading to excessive splatter and uneven cooking. Use a deep, heavy skillet instead for safer shallow-frying.
Dutch Oven Frying vs. Other Pots
Is the Dutch oven even the best tool? Compare it to the alternatives.
A dedicated deep fryer has built-in temperature control, a fine mesh basket, and a contained design that minimizes splatter and odor. It’s safer and more convenient. But it’s a unitasker that takes up storage space. The Dutch oven is a capable multitasker you already own.
A standard stainless steel stockpot is lighter and heats oil faster. It’s the choice for commercial kitchens doing high-volume frying. But it lacks the heavy, even heat retention of a Dutch oven, so the temperature fluctuates more dramatically when you add food. You’ll be adjusting the burner constantly.
The bottom line: For the home cook frying once a month, the Dutch oven is the perfect compromise. It’s heavy enough to hold steady heat, deep enough for safety, and already sitting in your cabinet. You’re trading a little convenience for a lot of versatility.
Frequently Asked Questions
Can you deep fry in a Le Creuset Dutch oven?
Technically, yes. Le Creuset discourages it to avoid permanent enamel discoloration (browning), not because the pot will crack. Many owners fry in them without issue. If you accept that the interior may darken, it’s safe for occasional deep frying. Staub models are explicitly approved for it.
What is the best oil for frying in a Dutch oven?
Use an oil with a high smoke point (above 400°F) and neutral flavor. Peanut oil (450°F), canola oil (400°F), and vegetable oil blends (around 400°F) are ideal. Avoid olive oil or butter; their low smoke points will burn and smoke long before reaching proper frying temperature.
How do you clean a Dutch oven after frying?
Let the oil cool completely, then pour it out. Wipe the interior with paper towels to remove grease. Wash with hot, soapy water and a soft sponge. For stubborn, polymerized oil stains, simmer a mixture of water and baking soda in the pot for 10 minutes, then scrub gently. Never use abrasive pads on enamel.
Can you reuse frying oil from a Dutch oven?
Yes, but with caveats. Strain the cooled oil through a cheesecloth to remove food particles. Store it in a sealed container in a cool, dark place. Reuse it only once or twice, and only for similar foods. Oil degrades each time it’s heated; you’ll notice it smoking at a lower temperature. The USDA food handling standards recommend discarding oil that smells rancid or is dark and foamy.
Is a Dutch oven safe for induction frying?
Yes, if the Dutch oven is induction-compatible. Check the base with a magnet. Most enameled cast iron Dutch ovens have a magnetic stainless steel or cast iron base that works. Induction provides excellent, responsive heat control for frying. Remember to never dry-heat the pot, even on induction.
Before You Go
Frying in a Dutch oven works when you respect its design. Match the material to the task, enameled for most home use, bare cast iron only if you’re not reusing oil. Obey the heat source rules: stovetop or outdoor fuel good, electric base bad. And never, ever let the pot heat up empty. The heavy walls that make it perfect for braising also make it a safe, steady vessel for hot oil. Keep a thermometer clipped to the side, fry in small batches, and you’ll get results as good as any single-purpose appliance. Just maybe don’t tell Le Creuset.
