
Dutch Oven Substitute: Best Alternatives for Perfect Bread
This post contains affiliate links. As an Amazon Associate, we earn from qualifying purchases.
A Dutch oven substitute is any oven-safe vessel that traps steam and provides intense, steady bottom heat to mimic a professional bread oven’s environment. The three most effective options are a cast iron skillet with a lid, a pizza stone or baking steel paired with a steam pan, and a $4 aluminum foil roasting pan placed over a baking sheet. Each replicates the critical steam chamber that keeps the crust soft for the first 5–10 minutes of baking, allowing for maximum oven spring and a crackly finish.
The physics are simple. A Dutch oven is just a heat-retaining box. Your goal is to copy that box with something that holds heat well and has a lid to capture moisture. The material matters less than the function.
What follows is a breakdown of the three proven substitutes, the science behind why they work, and the exact steps to avoid a pale, dense loaf. We’ll also cover what definitely won’t work and why.
Key Takeaways
- A cast iron skillet with a lid is the closest functional match to a Dutch oven, providing superior thermal mass and a tight seal for steam.
- An aluminum foil roasting pan placed over a parchment-lined baking sheet creates an effective, cheap steam chamber and has been documented to work reliably for over five years across multiple ovens.
- Never use a slow cooker or an unrated glass dish as a substitute; the slow cooker retains too much moisture for a crisp crust, and glass can shatter from thermal shock.
- Always preheat your substitute vessel along with your oven. A cold surface kills oven spring.
- Check bread doneness with a thermometer. The internal temperature should hit 195°F.
How a Dutch Oven Works (And What You’re Mimicking)
To pick a good substitute, you need to know what a traditional Dutch oven actually does. It’s not magic. It performs two jobs simultaneously.
First, its heavy walls, usually cast iron, act as a heat sink. They store massive thermal energy during preheating. When you place cool dough inside, the walls don’t cool down quickly. This provides steady, radiant heat from all sides, which drives a strong initial rise called “oven spring.”
Second, the tight-fitting lid traps the moisture evaporating from the dough itself. This creates a humid microclimate, a mini steam-injection oven. The steam keeps the loaf’s surface soft and stretchy for the first critical minutes of baking. If the crust sets too early, it restricts the rise. You get a pale, dense brick.
A Dutch oven traps the steam given off by the dough as it warms up. The steam allows the crust to stay soft and expand during the first 5-10 minutes of baking, before the bread structure sets and the crust hardens.
Your substitute needs to replicate both jobs: retained heat and trapped steam. If it only does one, you’ll need to compensate with another technique.
The 3 Most Effective Dutch Oven Substitutes
These options are ranked by how closely they mimic the full Dutch oven environment, from best to most accessible.
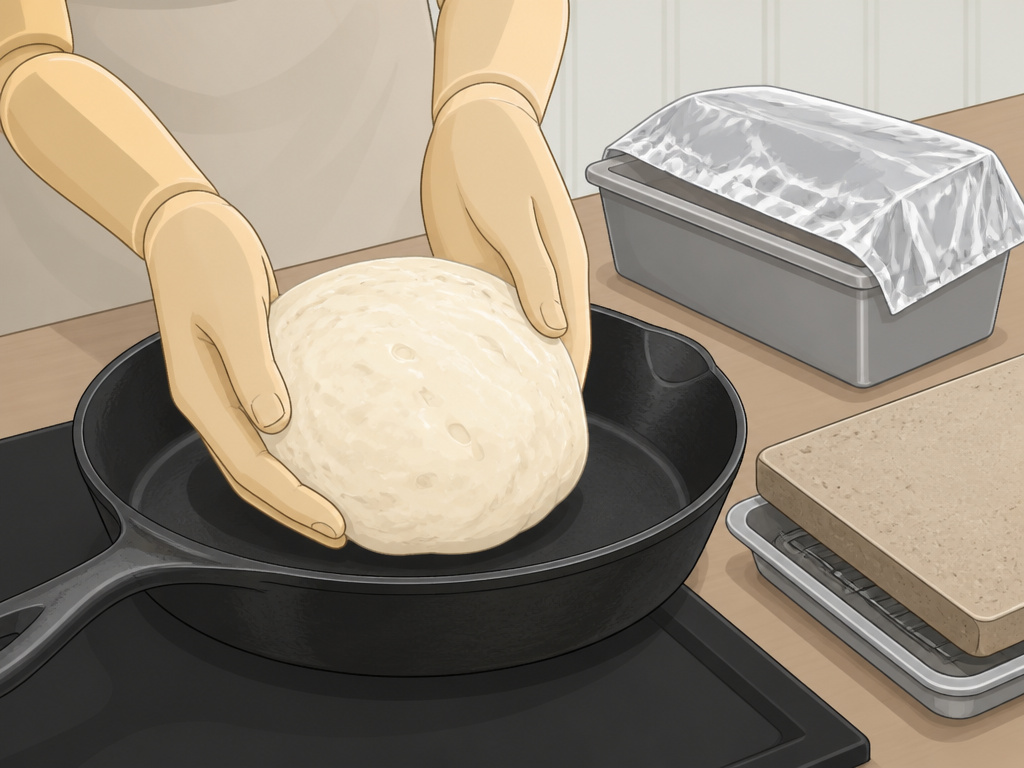
1. The Cast Iron Skillet & Lid Method
If you own any piece of cast iron cookware, you’re already most of the way there. A standard 10-inch or 12-inch skillet with a matching lid is a nearly perfect stand-in. The materials of a Dutch oven and a skillet are often identical, which is why this works so well.
The thick cast iron provides the necessary thermal mass. The lid, especially if it’s also cast iron or sits snugly, creates the essential steam chamber. It’s a miniature, sauna.
The Process:
- Place the empty skillet and its lid inside your cold oven.
- Preheat to your recipe’s temperature, usually 450°F to 500°F. Give it a full hour if you can.
- Shape your dough and place it on a square of parchment paper.
- When the oven is hot, carefully pull out the rack with the skillet. Use the parchment as a sling to lower the dough into the searing-hot skillet.
- Score the dough, put the lid on, and slide it back into the oven.
- Bake covered for 20-25 minutes, then remove the lid to allow browning for the final 15-20 minutes.
Common mistake: Not preheating the lid. If the lid is cold, it condenses steam instead of trapping it, creating a wet spot on top of your loaf.
This method is foolproof because the function of a Dutch oven, heat and steam, is duplicated exactly. It’s the substitute I reach for when my Dutch oven is already in use.
2. The Pizza Stone or Baking Steel with Steam
This is the method for bakers who already own a pizza stone or baking steel. It separates the two jobs: the stone provides intense bottom heat, and you manually add steam to the oven cavity.
A baking steel is superior for bread because it transfers heat more aggressively than ceramic. It gets hotter faster and gives a fiercer oven spring. A ceramic stone offers slower, steadier heat.
| Baking Surface | Heat Transfer | Best For | Preheat Time |
|---|---|---|---|
| Baking Steel | Rapid, intense | Maximum oven spring | 45-60 min |
| Ceramic Stone | Slow, steady | Even baking, longer bakes | 45-60 min |
The Process (Water Tray Method):
- Place your stone or steel on a middle rack. Put an empty, oven-safe metal pan (like a cast iron skillet or a rimmed baking sheet) on the bottom rack.
- Preheat the oven to your target temperature for at least 45 minutes.
- Shape your dough on a piece of parchment paper on a pizza peel or an inverted baking sheet.
- When ready to bake, pour 1 cup of boiling water into the preheated pan on the bottom rack. Immediately slide your dough onto the hot stone.
- Quickly close the oven door to trap the steam. Bake as directed.
The steam from the water pan humidifies the entire oven, keeping the crust soft. The stone gives that crucial bottom heat. It’s a professional approach that works for multiple loaves at once.
3. The $4 Aluminum Foil Roasting Pan Hack
This is the brilliant, frugal hack documented by a baker who used the same pan for five years and five moves. It proves you don’t need expensive enameled cast iron for a great loaf.
The “Bread-erator 2015,” as she called it, is simply a large aluminum foil roasting pan inverted over a loaf on a parchment-lined rimmed baking sheet. The pan acts as a loose lid, capturing enough steam from the dough while the baking sheet provides a stable base.
Why it works: Aluminum is a decent heat conductor. The enclosed space, while not as tight as a cast iron lid, still traps sufficient humidity. The real advantage is shape flexibility, you can bake batards or small baguettes that wouldn’t fit in a round Dutch oven.
I call it the Bread-erator 2015, and it has a place of honor in my kitchen. (And no, I still don’t own a Dutch oven.)
The timeline is specific. The baker’s first trial showed no browning until the cover was removed halfway through. That’s the key lesson: you must remove the foil pan for the final segment of baking to achieve a golden, crackly crust.
What NOT to Use as a Dutch Oven Substitute
Some kitchen items seem like they should work but will guarantee failure. Here are the common missteps.
A Slow Cooker or Crock Pot
This is the worst choice. A slow cooker is designed to retain all moisture at a low temperature. Your bread will steam instead of bake, resulting in a pale, soft, and gummy crust. The differences between a crock pot and Dutch oven are fundamental; they are not interchangeable for baking.
An Unrated Glass Bowl or Baking Dish
Standard glass mixing bowls or dishes not labeled as oven-safe can shatter under high bread-baking temperatures. Even oven-safe Pyrex requires caution.
Where this goes sideways: Placing a cold glass dish into a 500°F oven. The thermal shock can cause it to crack explosively. Always let glass come to room temperature first.
If you use an oven-safe glass dish like a Pyrex bowl as a lid, you must also adjust the temperature. Glass insulates and can cause the edges of your bread to over-brown. Drop your oven temperature by 25°F to compensate.
A Large Pot with a Ill-Fitting Lid
A standard stockpot is too thin-walled, it lacks thermal mass. A loose, lightweight lid lets all the steam escape. If the lid doesn’t sit snugly, you lose the steam chamber effect. If you must use a pot, make sure it’s heavy-bottomed and seal any gaps with aluminum foil.
Choosing Your Substitute Based on Your Dough
 Not all breads have the same needs. Match your vessel to your recipe.
- High-Hydration Artisan Loaves (No-Knead Bread): These need the most steam. Opt for the cast iron skillet or the foil pan method for a tight steam chamber.
- Sandwich Loaves in a Loaf Pan: Here, shape is defined by the pan. A metal loaf pan conducts heat fast. To mimic steam, loosely tent the pan with aluminum foil for the first 15 minutes of baking.
- Focaccia or Rolls: These are baked free-form. Use a preheated baking steel or stone with the water tray method. The steam surrounds the dough, and the hot surface gives a crisp bottom.
No matter the method, always verify doneness with a digital thermometer. The center of the loaf should register 195°F. Relying on color or sound alone leads to underbaked bread.
Frequently Asked Questions
Can I use a stainless steel pot with a lid?
You can, but it’s a weak substitute. Stainless steel has much lower thermal mass than cast iron. It won’t hold heat as steadily, which can reduce oven spring. If it’s all you have, preheat it thoroughly and ensure the lid fits tightly. The results will be better than an open bake, but the crust may be less crisp.
Why is my bread pale when using a substitute?
Pale bread means the crust set before it could expand. The steam chamber failed. The lid might be too loose, you might have removed the cover too early, or your oven temperature is too low. Make sure your vessel is preheated and sealed. For the foil pan method, don’t peek for the first 20 minutes.
Do I need to adjust baking times with a substitute?
Yes, often by a few minutes. Different materials transfer heat at different rates. A baking steel may bake bread faster than a ceramic stone. Start checking your loaf 5 minutes before your recipe’s suggested time. Use the 195°F internal temperature as your true guide, not the clock.
Is a combo cooker a good Dutch oven substitute?
Combo cooker, a deep skillet with a shallow lid that doubles as a skillet, is actually a primary baking vessel, not a substitute. It functions identically to a Dutch oven and is a favorite among bread bakers because it’s easier to load dough into the shallow side. If you have one, use it.
Before You Go
You don’t need a $300 enameled Dutch oven to bake professional-level bread at home. The principles are what matter: preheat a heavy vessel and trap steam around your dough.
For most home bakers, the cast iron skillet you already own is the best tool for the job. It’s a direct translation of the Dutch oven’s cooking principles. For the budget-conscious, the aluminum foil roasting pan is a proven, five-year solution. And for those who bake often, investing in a baking steel will transform not just your bread but your pizza and pastries too.
Pick one method and stick with it for three bakes. You’ll learn its quirks, and by the third loaf, you’ll have a reliable, crusty result that makes the whole kitchen smell like a bakery.
