
Can You Season Stainless Steel Cookware? A Full Guide (58 chars)
This post contains affiliate links. As an Amazon Associate, we earn from qualifying purchases.
You can season stainless steel cookware, but the word “seasoning” means two completely different things. For a permanent, protective polymerized layer like cast iron, the answer is no, stainless steel won’t hold it. For a temporary, slick surface to cook eggs or fish, the answer is yes, and it’s a simple five-minute trick. Some manufacturers, like Vollrath, even prescribe a specific oil-heating procedure before first use for their uncoated stainless steel and aluminum pans.
That split in definitions is where most guides get tangled. One camp says never season it, the other says you must. They’re both right, depending on which goal they’re talking about.
What follows is the breakdown: the official manufacturer stances that contradict each other, the chemistry of why a temporary layer works but doesn’t stick around, and the two distinct step-by-step processes, one for initial setup, one for Tuesday’s omelet.
Key Takeaways
- “Seasoning” is not one technique. Permanent seasoning (for rust protection) doesn’t work on stainless steel. Temporary “conditioning” (for non-stick) does.
- Manufacturers disagree. Vollrath’s manual specifies a 5–10 minute oil-heating ritual for new pans. Le Creuset says only pans with a non-stick interior need it. Lagostina says skip it entirely.
- The temporary layer is polymerized oil. It fills microscopic pores for one cooking session, then washes off with soap. It’s a trick, not a cure.
- Preheating is non-negotiable. For the temporary method to work, your pan must be hot enough for the Leidenfrost effect, water droplets skitter like mercury.
- Soap is not the enemy. Washing with dish soap after using either seasoning method is fine. It removes the temporary oil and any burnt-on food without damaging the pan.
The Official Manufacturer Stance on “Seasoning”
Don’t look for consensus. Look at the manual that came in the box. The advice fractures along brand lines, and each one is defining “seasoning” differently.
Season cookware before its first use. Clean and dry cookware. Spray the inside of the pan lightly with vegetable oil or use a small amount of shortening. Place cookware on burner at medium for 5-10 minutes, until light smoke or heat waves appear. When the oil/shortening turns a deep amber color, turn the burner off and allow to cool. . Vollrath Cookware Care and Use Instructions
That’s a direct quote from a commercial kitchen supplier. It’s a mandatory first step for their uncoated stainless steel and aluminum lines. The goal isn’t a non-stick surface for eggs. It’s a polymerized oil layer that fills microscopic pores from day one, which they state can be maintained with regular washing.
Contrast that with Le Creuset. Their guidance draws a line based on the pan’s interior coating. They advise conditioning stainless steel pans with a non-stick interior before first use and after dishwasher cycles. For their classic, uncoated stainless steel? They say it doesn’t need seasoning at all.
Then there’s Lagostina. Their position is the clearest: stainless steel is designed to perform best without any permanent coating. Any oil treatment is a temporary technique for a single cook, not a foundational step.
| Brand / Source | Stance on “Seasoning” | Key Condition / Note |
|---|---|---|
| Vollrath | Required before first use | For uncoated stainless steel & aluminum; 5-10 min heat process |
| Le Creuset | Required for pans with non-stick interior only | Uncoated stainless steel does not need it |
| Lagostina | Not needed; temporary technique only | Defines seasoning as a per-use trick, not a permanent layer |
| The Chopping Block | Temporary method only | “This isn’t seasoning in the traditional sense…” |
So who’s right? They all are, for their specific products and intended outcomes. Your first stop should always be your own pan’s care guide. If you lost it, lean toward the temporary method, it’s harmless and reversible.
How “Seasoning” Actually Works on Stainless Steel
Forget everything you know about cast iron. The black, slick patina on a well-loved skillet is a polymerized oil layer built up over dozens of uses. The oil breaks down under high heat and bonds to the iron, creating a durable, semi-permanent coating that prevents rust and reduces sticking.
Stainless steel is alloyed with chromium, which forms a passive oxide layer that makes it rust-resistant inherently. It doesn’t need a polymerized coat for protection. The surface is also less porous than cast iron, so it doesn’t grab onto and hold that oil layer over time.
When you heat oil in a stainless steel pan, polymerization still happens. The oil breaks down and forms a temporary, slick film. This film can fill the microscopic pores in the metal’s surface, which is the basis for claims that it “preserves the pan” or enables “bacteria-free cooking.”
Where this goes sideways: Believing this layer is permanent. It’s not. It’s a temporary fill. Cooking, especially with acidic ingredients, and washing with soap will break it down and flush it out within a meal or two.
That’s the core mechanic. You can create a non-stick surface for your next meal, but you aren’t building an asset for next year. This is why the seasoning process for stainless steel is a quick pre-cook ritual, not a lifelong maintenance commitment.
The Two “Seasoning” Processes You Need to Know
Because the word is overloaded, you must separate the techniques by their goal. One is for initial pan setup (following a manual like Vollrath’s). The other is for immediate non-stick performance during cooking.
1. The Initial Manufacturer-Recommended Process
If your manual calls for it, or you have a new, uncoated pan and want to follow the most thorough protocol, this is it. This mimics the Vollrath method.
What you’ll need:
- Your new stainless steel pan
- Mild dish soap
- High-smoke-point oil (vegetable, canola, grapeseed) or shortening
- Paper towels
- Tongs
Steps:
- Wash the pan. Scrub it with hot, soapy water to remove any manufacturing oils or residues. Dry it thoroughly.
- Apply a thin oil coat. Place the pan on a cold burner. Add about a teaspoon of oil or a small dab of shortening. Use a paper towel to spread it into a thin, even film over the entire interior cooking surface.
- Heat the pan. Turn the burner to medium heat. Let the pan heat for 5 to 10 minutes. You’re watching for two cues: light smoke rising from the surface, and the oil changing to a deep amber color. Don’t let it burn black.
- Cool and remove excess oil. Turn off the heat. Let the pan cool completely on the burner. Once cool, pour out any pooled oil and wipe the interior vigorously with fresh paper towels until no oil residue comes off.
This process may darken the pan’s interior slightly. That’s fine. According to Vollrath, washing with a mild soapy solution after each use won’t remove this base layer, and you can repeat the procedure anytime.
2. The Temporary “Pre-Cook” Seasoning Method
This is the weekday workhorse technique. It’s for when you’re about to cook something prone to sticking, eggs, fish, grilled cheese. It takes three minutes.
Common mistake: Adding oil to a cold pan. The oil will soak into the microscopic pores and polymerize unevenly, leading to sticky spots. Always preheat the pan dry first.
Steps:
- Preheat the dry pan. Place your clean, dry pan on a burner over medium to medium-high heat. Let it heat for 2-3 minutes.
- Test for the right temperature. Flick a few drops of water into the pan. If they evaporate instantly, it’s not hot enough. If they bead up and skitter around like mercury, you’ve achieved the Leidenfrost effect. The pan is now perfectly hot.
- Add your oil. Immediately add your cooking oil or fat (butter, avocado oil, etc.). It should shimmer and develop surface ripples within seconds.
- Swirl and proceed. Swirl the oil to coat the surface, then immediately add your food. The instant polymerization creates that temporary non-stick barrier.
When you’re done, wash the pan normally. The layer is gone. You’ll rebuild it next time.
Why Preheating is Your Most Important Tool
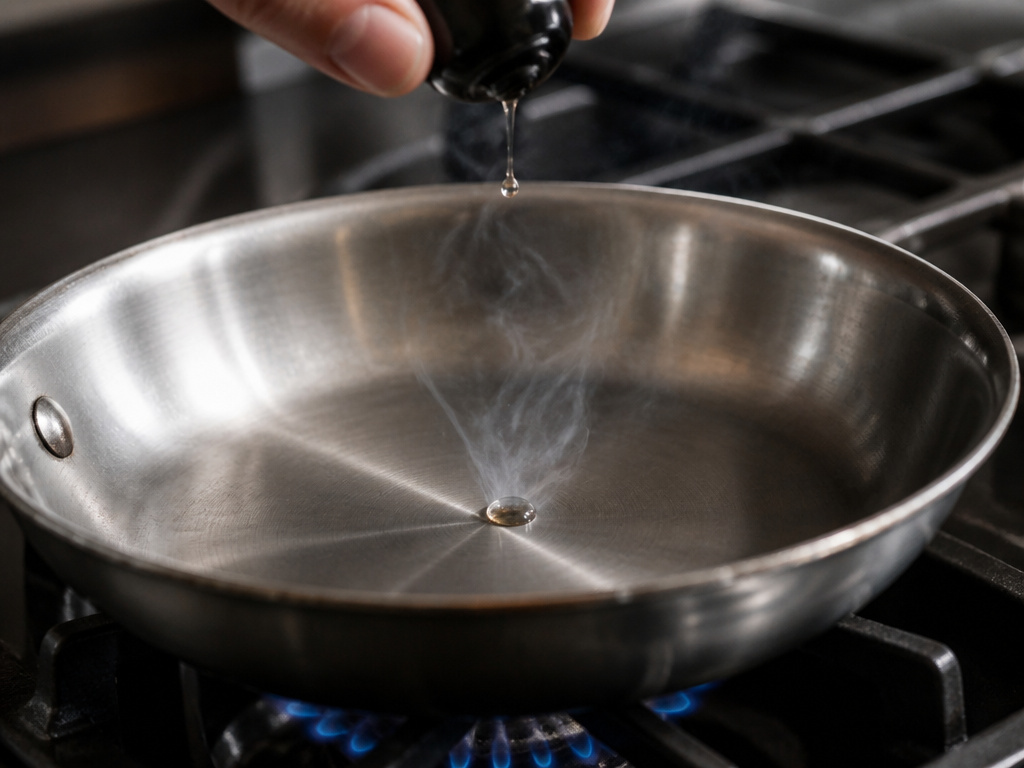
The temporary method fails without correct preheating. Heat does two critical things. First, it causes the metal to expand slightly, closing up some of its microscopic pores. Second, it ensures the oil you add immediately begins to polymerize, rather than soaking in.
Adding room-temperature food to a properly preheated pan also prevents thermal shock, which can cause warping over time. This is especially crucial for multi-ply or disc-bottom pans.
If your food sticks using this method, 90% of the time the pan wasn’t hot enough when the oil went in. The other 10% is usually moving the food too early. Let it sear and release on its own.
What Not to Do: The “Non-Seasoning” Essentials
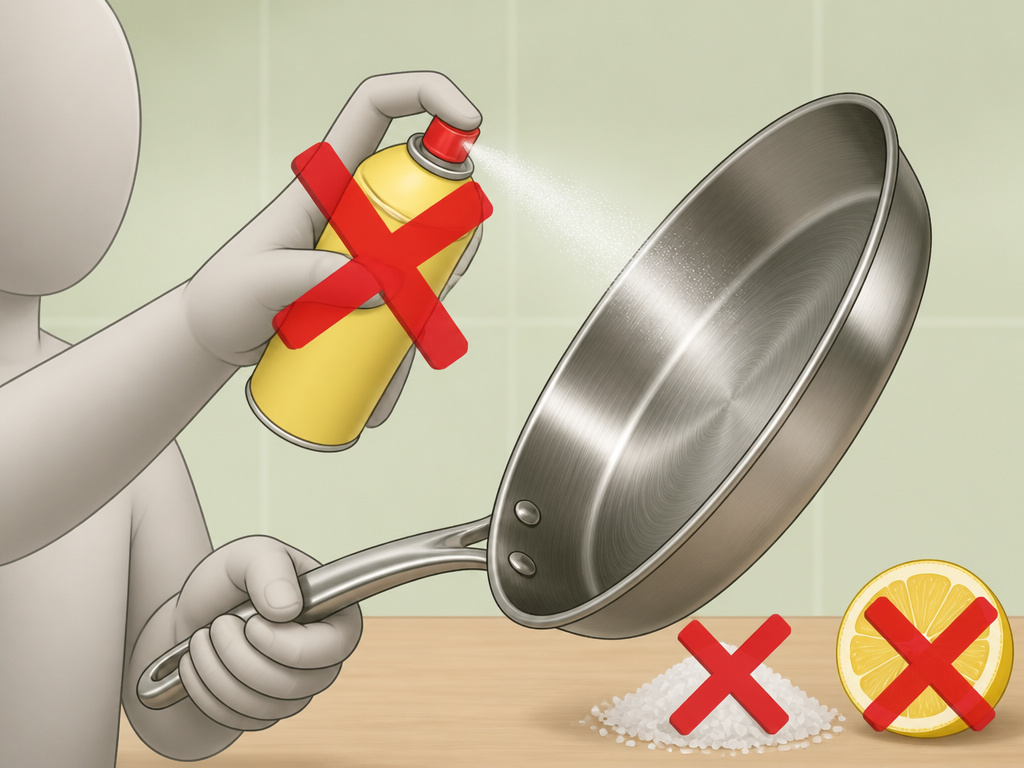
A seasoned pan, temporary or otherwise, isn’t a magic force field. You still have to cook correctly.
- Don’t use cooking spray. The emulsifiers and propellants (like lecithin) in many sprays are designed to stick. They can create a gummy, carbonized film on your pan that’s a nightmare to scrub off. Use real oil.
- Don’t add salt to a cold, dry pan. Undissolved salt grains can scour the surface, leading to pitting. Always add salt to water as it’s heating, or sprinkle it over food already in the pan.
- Don’t overcrowd. Adding too much food drops the pan’s temperature dramatically, causing food to steam and stick instead of sear. Cook in batches.
- Don’t let acids linger. After cooking with tomatoes, wine, or vinegar, wash the pan promptly. Prolonged exposure won’t ruin the pan, but it can break down any temporary oil layer and give the food a metallic taste.
Cleaning is straightforward. Use soap, water, and a non-abrasive sponge. For burnt-on residue, a paste of Bar Keepers Friend and water is the standard restoration tool. It cleans without damaging the underlying metal.
Frequently Asked Questions
Does seasoning stainless steel make it non-stick?
It creates a temporarily non-stick surface for a single cooking session. It is not a permanent transformation like on cast iron. The effect washes away with soap and water.
Can you use olive oil to season stainless steel?
You can, but it’s not ideal. Olive oil has a lower smoke point and can become sticky or gummy when polymerized. For the initial or temporary methods, a neutral, high-smoke-point oil like canola, grapeseed, or avocado oil works more reliably.
How often should I season my stainless steel pan?
If you follow a manufacturer’s initial process (like Vollrath’s), once before first use is sufficient. For the temporary pre-cook method, do it every time you cook foods that are prone to sticking.
Will soap ruin the seasoning on my stainless steel?
No. Soap will remove the temporary polymerized oil layer, which is the intent. It will not damage the pan itself or affect any manufacturer-recommended initial seasoning. Modern dish soaps are mild and won’t harm the metal.
Why do some chefs say not to season stainless steel?
They are usually referring to the concept of building a permanent, cumulative layer. Since stainless steel doesn’t retain seasoning like cast iron, they view the effort as pointless. They typically advocate for mastering temperature control (the preheat-and-sizzle method) instead of relying on an oil treatment.
What’s the difference between seasoning stainless steel and cast iron?
The difference is permanence. Cast iron seasoning is a bonded, protective layer that builds and improves over time. Stainless steel “seasoning” is a temporary, sacrificial layer that lasts for one cook. The goal for cast iron is rust prevention and non-stick. The goal for stainless is momentary non-stick only.
Before You Go
You can season stainless steel cookware, but you’re managing a short-term fix, not a long-term investment. The permanent, rust-blocking patina belongs to cast iron. The slick surface for your Sunday eggs is a three-minute heat-and-oil ritual.
If your pan’s manual says to do it, follow those steps once. For everything else, master the temporary method: preheat until water beads, add oil until it shimmers, then cook. When you’re done, wash it with soap. That’s the whole cycle. No mystery, no cultish maintenance, just a clean pan ready for whatever comes next.
