
How Do You Clean a Dutch Oven and Prevent Rust & Chips
This post contains affiliate links. As an Amazon Associate, we earn from qualifying purchases.
To clean a Dutch oven, you match the method to its material: enameled models get hand-washed with warm soapy water and a non-abrasive sponge; unseasoned cast iron requires hot water, a nylon scrubber, and immediate drying followed by a thin coat of oil; electric units like the All-Clad SD922D51 demand you never submerge the heating base. The universal rules are no metal utensils, no steel wool, and no sudden temperature changes. Skip these, and you trade a lifetime pot for a chipped, rusty, or malfunctioning one in under a year.
That material split is the whole game. Enamel is a glass coating fused to iron. Scratching it exposes the raw metal underneath to water and air, which is how rust starts at the chip edge within a week in a humid kitchen. Cast iron is porous. If you let water sit in those pores, surface rust appears in 24 hours. Electric bases have circuitry that dies on contact with liquid. Getting the clean right means understanding what you’re actually protecting.
What follows: the daily routine, the battle plan for burnt messes, the bleach trick for cream interiors, and the specific rules for electric and outdoor cast iron that manuals often bury in the small print.
Key Takeaways
- Thermal shock cracks enamel. Never pour cold water into a hot Dutch oven. Let it cool to warm first.
- Abrasive cleaners scratch the glassy surface of enamel. Once scratched, stains set in permanently and rust can start at the chip.
- Unseasoned cast iron must be dried on the stovetop after washing. Evaporating all moisture is the only way to stop surface rust from forming overnight.
- Electric Dutch oven heating units are never submersible. Clean the base with a damp cloth only; submerging it voids the warranty and risks shock.
- Storage with the lid off prevents moisture traps. Trapped humid air is the main cause of off smells and rust on the rim, even on enameled pieces.
The Daily Clean (Soap, Water, and a Soft Sponge)
For an enameled Dutch oven after a simple soup or stew, the process is straightforward. Let the pot cool until it’s warm to the touch, not scorching hot. Add a few inches of warm water and a drop of dish soap.
Use a non-abrasive sponge or a soft nylon brush. Scrub in a circular motion, rinse with warm water, and towel dry immediately—especially the bare cast iron rim. This routine prevents 90 percent of cleaning problems.
The rim is the most overlooked part. Both Le Creuset and Staub pots have an exposed cast iron rim around the top where the enamel stops. If you let water air-dry there, you will see faint orange rust spots within a month. Dry it with a towel, every time.
Never use steel wool, metal scrubbers, or abrasive powders like conventional scouring cleansers on the enameled interior. They create microscopic scratches. These scratches become permanent homes for oil and food particles, leading to the brown staining that many people mistake for seasoning. A scratched surface also loses its smooth non-stick properties, which is a primary cause of food sticking on subsequent uses.
Is the dishwasher an option? Most enameled Dutch ovens are technically dishwasher safe. The high-heat wash and harsh detergent, however, will dull the glossy exterior finish over dozens of cycles. More critically, the powerful spray can chip the enamel where the pot rattles against the rack. For daily use, hand washing is the only method that preserves the pot’s appearance and function for decades.
Tackling Burnt-On Food and Stubborn Stains
Sometimes you get distracted and the onions go too far. A layer of stuck-on, carbonized food doesn’t mean the pot is ruined. It means you skip the scrubbing and use chemistry.
Fill the Dutch oven halfway with water. Add baking soda—about one tablespoon per cup of water. Bring it to a simmer on the stovetop and let it bubble gently for five minutes. The alkaline baking soda solution loosens the bond between the food and the enamel. Let it cool completely in the pot.
Common mistake: Scrubbing a burnt mess dry. You’ll scratch the enamel before you remove the stain. Always loosen it with a simmering solution first.
Once cool, pour out the liquid. The burnt layer should have lifted or softened significantly. Use your soft sponge or a nylon scraper to wipe it away. For persistent spots, make a paste of baking soda and a little water, apply it directly, and let it sit for 15 minutes before gently rubbing.
For grease stains or a dull film that soap won’t cut, the professional fix is Bar Keepers Friend. The oxalic acid in this soft cleanser targets mineral stains and organic residues without the abrasives that scratch. Rinse the pot, sprinkle the powder on the damp stain, and gently work it with your sponge in a circular motion. Rinse thoroughly. This is the same method Staub recommends in their official care video.
If you have a cream-colored interior, like those on many Le Creuset and Cuisinart models, a dark stain can make it hard to monitor browning. America’s Test Kitchen has a specific solution for this.
Make a solution of 1 part household bleach to 3 parts water and pour it into your Dutch oven. Let it sit overnight. Rinse the pot very well the next day. Do this in a well-ventilated area and keep it away from kids and pets.
This isn’t for general cleaning. It’s a periodic restoration for visual clarity. For a truly scorched Dutch oven where baking soda fails, this bleach soak is the next step before considering more aggressive measures.
What About Electric and Unenameled Cast Iron?
Not all Dutch ovens live on the stovetop. Electric models and bare cast iron for camping have completely different rulebooks.
The Electric Dutch Oven (Like the All-Clad SD922D51)
This is a hybrid appliance: a removable cast iron pot sitting in an electric heating base. The manual for the All-Clad 5Qt. Model is explicit.
Never submerge the heating unit in water or any liquid. The outside shell cleans with a soft cloth and warm, soapy water, then a dry towel. The removable cast iron pot is dishwasher safe, but All-Clad recommends hand washing and immediate drying to prevent rust. They also advise periodic seasoning: coat the inside of the pot and lid with cooking oil, then place them in a 350°F oven for 10 minutes.
The critical warning is about the base. Getting the circuitry wet is an instant repair issue. This is a common point of failure for owners who treat it like a standard pot.
Bare Cast Iron Dutch Ovens (The Camping or Outdoor Type)
These lack an enamel coating and rely on a built-up layer of polymerized oil called a patina. Cleaning them is about preserving that patina.
| Do This | Not That | Why It Matters |
|---|---|---|
| Use hot water and a nylon brush or scrubber. | Never use dish soap or steel wool. | Soap strips the patina; steel wool scratches the iron open, inviting rust. |
| Dry immediately with a towel, then on a warm burner. | Never let it air dry. | Water left in pores causes surface rust within hours. Heat evaporates all moisture. |
| Apply a thin coat of heat-safe oil after drying. | Don’t store it with a greasy, sticky layer. | A thin oil coat protects during storage; a thick coat turns rancid and sticky. |
| Store with the lid off, with a paper towel inside. | Never seal it closed while damp. | Trapped moisture guarantees rust and creates a musty Dutch oven smell. |
This process is the core of cleaning cast iron. If the patina is damaged or rust appears, you must strip and re-season the pot, which is a much larger project.
The “Why You Maybe Shouldn’t” Clean It Perfectly

America’s Test Kitchen made a compelling argument: a perfectly spotless Dutch oven is a useless status symbol. Light scratches, minor staining, and small utensil marks are badges of honor. They prove the pot is being used as a tool, not displayed as art.
The only functional reason to aggressively clean the interior is if the staining on a light-colored enamel is so dark it obscures browning. Otherwise, a little patina on an enameled pot is fine. It’s the deep scratches, chips, and rust you’re fighting against.
A chip in the enamel is a different story. If you see a chip where the black iron is visible, that spot will rust. Continued use risks that rust spreading or flakes entering food. At that point, you’re diagnosing a damaged Dutch oven and must decide on repair or replacement.
Storage: The Step Everyone Forgets
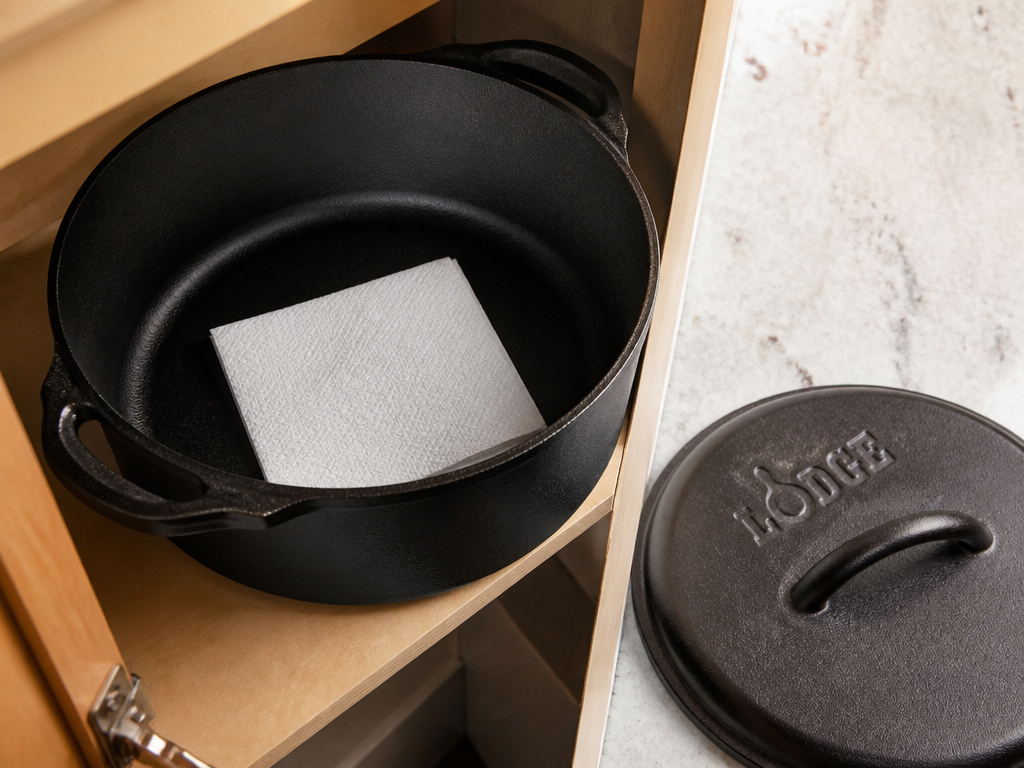
How you put the pot away determines what you find when you pull it out next week.
Always store your Dutch oven completely dry. For cast iron and enameled models with a bare iron rim, place the pot in a dry, open cabinet. Store the lid separately, upside down or to the side. Closing the lid creates a sealed, humid environment that promotes rust on the rim and can lead to mildew odors.
For long-term storage of a bare cast iron pot, place a folded piece of paper towel inside the pot and another between the pot and the lid. This absorbs any ambient moisture and allows for air circulation, which is the advice from outdoor gear manufacturer Skandika. This simple habit prevents the heartbreak of opening your prized pot to find a ring of red rust.
Frequently Asked Questions
Can you use soap on a cast iron Dutch oven?
Yes, modern dish soap is fine. The old rule came from lye-based soaps that would strip seasoning. Today’s mild detergents cut grease without harming the polymerized oil patina. The real enemy is soaking, which leads to rust.
Why is my enameled Dutch oven turning brown inside?
This is usually a combination of tiny scratches and baked-on oil. Using abrasive cleaners or metal utensils creates micro-scratches. Oil and food particles bake into these scratches during cooking, creating a stained, sticky layer that looks like seasoning. Restore it with a Bar Keepers Friend treatment or a bleach soak (for cream interiors).
Is it safe to soak a Dutch oven?
It depends. Soaking an enameled pot in warm, soapy water to loosen food is generally safe. Soaking an unseasoned cast iron pot for hours is a direct path to rust. For specific guidelines, our guide on soaking a Dutch oven breaks down the risks by material.
How do I remove rust from the rim?
For light surface rust on an enameled pot’s rim, use a paste of baking soda and water with a non-abrasive scrubber. For cast iron, use a nylon brush and a little vinegar, then rinse, dry immediately, and re-season the affected area. The goal is to remove the rust without damaging the surrounding enamel or patina.
My Dutch oven has a funny smell. What now?
Musty or metallic smell usually means moisture was trapped during storage. Wash the pot thoroughly, dry it completely—including on a warm burner—and let it air out with the lid off. For persistent odors, a bake-out in a 350°F oven for an hour can help. If the smell is from burnt plastic or something foreign, the issue may be more serious.
How often should I season my Dutch oven?
Enameled Dutch ovens never need seasoning. Bare cast iron Dutch ovens need seasoning when the surface looks dry, gray, or patchy, or after any rust removal. A well-maintained pot might only need a fresh oil coat once or twice a year. The seasoning process is simple: a thin oil coat baked on in a hot oven.
The Bottom Line
Cleaning a Dutch oven isn’t about keeping it museum-perfect. It’s about preserving the tool. For enamel, that means soft sponges and no thermal shock. For cast iron, it means instant drying and a drop of oil. For electric models, it means keeping the base dry. The pots that last for generations are the ones washed with understanding, not just soap. Ignore the material, and you’ll be shopping for a replacement long before the warranty expires. Respect it, and your grandchildren will argue over who gets it.
