
How Do You Season a Cast Iron Griddle? Oven & Stovetop Methods
This post contains affiliate links. As an Amazon Associate, we earn from qualifying purchases.
**Season a cast iron griddle by applying a microscopically thin layer of high-smoke-point oil and heating it past its smoke point, between 300°F and 500°F depending on your method, until it polymerises into a hard, slick coating. This is a baked-on layer you maintain, not a one-time treatment. GE’s manual specifies 350°F for one hour in an oven.Commercial manuals like Vulcan’s prescribe one ounce of oil per square foot at 300-350°F. The goal is a bonded finish that blocks rust and releases food.
That temperature window is where the chemistry happens. Too low, and the oil stays sticky. Too high, and it carbonises into a flaky, black dust. The difference between a mirror-smooth cooking surface and a gummy, smoking mess is about fifty degrees and the patience to let the griddle cool completely between layers. Most failures happen because someone rushed the cool-down or used too much oil.
What follows is the breakdown of those specs: why 350°F is the sweet spot for most home ovens, which oils cross the finish line without turning acrid, and the one pre-cleaning step some commercial models demand that home manuals never mention. By the end, you’ll be able to read any griddle’s instructions and know whether it needs a gentle oven cure or a direct-flame baptism.
Key Takeaways
- The target temperature is 300–350°F for electric/gas griddles and 350–500°F for oven seasoning. Exceeding 500°F risks burning the seasoning layer.
- Use one ounce of oil per square foot of cooking surface as a measured starting point. Wipe off every visible drop until the surface looks dry.
- Avocado, grapeseed, or refined soybean oil are top picks for high smoke points and neutral flavor. Avoid olive oil and butter for the initial layers.
- Cool the griddle completely between seasoning layers. Applying oil to a warm surface creates a tacky, uneven finish that attracts carbon.
- Season after every deep clean. A weekly scrub with a griddle brick or chain-mail scrubber strips the top layer, requiring a quick re-season to protect the iron.
The Core Process: Heat, Oil, Cool, Repeat
Seasoning is controlled burning. You’re not coating the iron with oil. You’re using heat to break the oil’s molecular chains so they reform as a plastic-like polymer directly bonded to the metal. This is why smoke point matters. An oil must be heated to its specific smoke point, the temperature where it begins to decompose, to trigger polymerisation.
Heat griddle to a low temperature (300-350°F) and apply a small amount of cooking oil – about one ounce per square foot of surface. Use a soft lint-free cloth to spread the oil over the entire griddle surface to create a thin film. Wipe off any excess oil with a cloth. – Vulcan VCCGxx Heavy Duty Gas Griddles Installation & Operation Manual
That “thin film” is the whole game. If you can see wet oil, you’ve used too much. The excess will pool, turn sticky, and carbonise into black speckles. The correct amount leaves the surface looking slightly damp, almost matte.
Here is the universal sequence, adaptable to oven or stovetop:
- Clean the bare iron. Wash a new griddle with hot, soapy water to remove factory oils or protective wax. Dry it immediately and thoroughly with a towel, air drying invites flash rust. For some commercial units like the Waring WGR240X, the manual mandates a pre-clean with steel wool and detergent to remove specific machining residues.
- Apply the oil. Pour a small amount of high-smoke-point oil onto the cool surface. Spread it with a paper towel or lint-free cloth until the entire surface, including edges and sides, has a sheen. Then, take a fresh towel and wipe everything off. The goal is to leave only a molecular layer.
- Heat past the smoke point. Place the griddle in a 350°F oven for one hour (per GE’s method) or on a burner over medium heat until the oil smokes lightly and the surface darkens. The oil will smoke, then stop. That’s the polymerisation completing.
- Cool completely. This is non-negotiable. Let the griddle cool back to room temperature in the oven or on the stovetop. Rushing this by applying the next layer to a warm pan creates a soft, tacky layer that will peel.
- Repeat. Three to four cycles build a durable base. After that, maintenance is simple: cook with fats, clean gently, and apply a fresh micro-layer after each use.
| Common Mistake | The Consequence | Timeline to Failure |
|---|---|---|
| Using too much oil | Pooled oil carbonises into sticky, black gunk. | Evident after the first heating cycle. |
| Not cooling between layers | Layers remain soft and tacky, attracting food carbon. | Peeling starts within 2-3 uses. |
| Using low-smoke-point oil (e.g., olive oil) | Oil burns before polymerising, creating a bitter, flaky coat. | Flakes off into food on first preheat. |
| Skipping the initial steel wool scrub (on specific models) | Factory coating prevents oil bonding; seasoning flakes. | Failure is immediate and uniform. |
Oven vs. Stovetop Seasoning: Which Method Wins?
Your griddle’s design dictates the best method. A standalone cast iron plate or a small countertop model fits in an oven. A built-in kitchen range griddle or a massive commercial flat-top requires stovetop seasoning.
Oven seasoning is the most controlled and even. It heats the entire piece of iron uniformly, edges and all, which prevents warping and ensures the seasoning bonds on every surface. This is the method specified by GE Appliances: 350°F for one hour. It’s ideal for new griddle plates and for restoring heavily rusted pieces. The enclosed environment also minimises smoke.
Stovetop seasoning is for appliances that don’t move. You heat the plate in place, applying oil directly to the cooking surface. This is the only option for built-in range griddles or large commercial units. The challenge is hot spots. Burners create uneven heat, so you must move the oil around constantly to prevent pooling in cooler zones. The Waring Commercial manual for the WGR240X details this: heat on high, apply a tablespoon of oil, let it burnish for 5-10 minutes, and repeat eight times.
Where this goes sideways: Seasoning a cold griddle on a hot burner. The thermal shock can warp thin iron plates, creating a permanent low spot where grease pools. Always start with a cold griddle on a cold burner, then bring the heat up gradually.
For most home cooks with a removable plate, the oven is the default. It’s set-and-forget. For everyone else, the stovetop is the necessary path. The polymerisation result is identical if you manage the heat.
Choosing Your Griddle Seasoning Oil
The oil is your raw material. Its smoke point determines the temperature at which it transforms from a liquid fat into a solid coating. Too low, and it burns. Too high, and you might not reach the required temperature for proper bonding.
Best for durability: Avocado oil or refined soybean oil. Their smoke points hover around 520°F and 450°F respectively, well above the target 350-400°F seasoning window. This gives you a large margin for error. The polymerised layer is hard and stable. Many manuals, including Napoleon’s, explicitly recommend high-smoke-point vegetable oils.
The classic choice: Crisco or other vegetable shortening. Solid at room temperature, it’s easy to apply a thin layer. It has a smoke point around 360-400°F, making it perfect for the standard 350°F oven method. It’s a consistent, foolproof option for a brand new griddle.
Avoid for initial layers: Olive oil, butter, animal fats. Olive oil has a low smoke point and contains organic compounds that can create a gummy residue. Animal fats like lard or bacon grease are fantastic for maintaining an already-established seasoning but can go rancid if used for the initial, thick base layers on a bare pan. The Napoleon Freestyle manual explicitly warns: “Do not use animal fats for your first” seasoning.
| Oil Type | Approx. Smoke Point | Best For | Risk If Used Wrong |
|---|---|---|---|
| Avocado Oil | 520°F | Oven seasoning at 450-500°F; durable base layers. | May not fully polymerise if oven temp is too low (<400°F). |
| Refined Soybean/Corn Oil | 450°F | Standard oven (350°F) or stovetop seasoning. | None if used at correct temp. The default for most manuals. |
| Vegetable Shortening (Crisco) | 360-400°F | The classic 350°F oven method; easy thin application. | Can leave a slight waxy feel if not heated sufficiently. |
| Flaxseed Oil | 225°F | Not recommended. Very low smoke point. | Flakes off in hard sheets due to brittle polymerisation. |
The best oil for seasoning is the one you can apply in a near-invisible film and heat past its smoke point with your available equipment. For 95% of home ovens, that’s refined soybean or corn oil.
The Manufacturer Specifics You Can’t Ignore
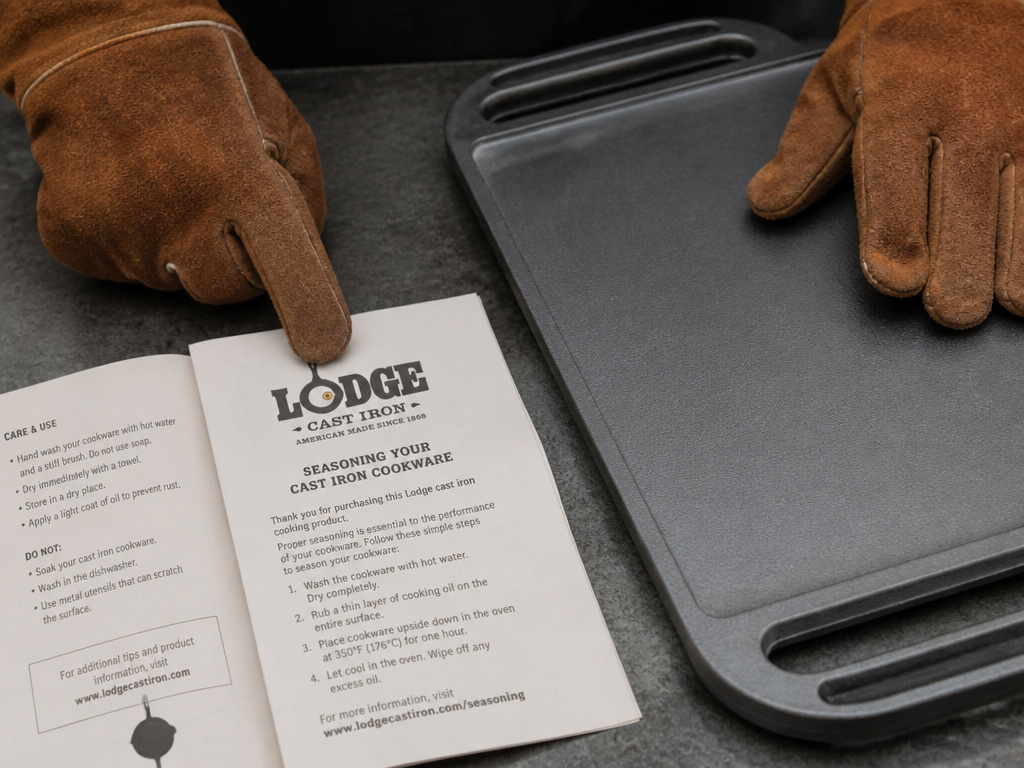 Griddle manuals are written for the specific finish and alloy of that product, not as generic advice. Ignoring them voids warranties and guarantees a subpar result.
GE Appliances, KitchenAid, and similar home brands prescribe the gentle oven method. The KitchenAid KDRP467 manual is strikingly simple: apply 1 tsp (5 mL) of vegetable oil, heat to 350°F until it smokes, then turn off and cool. This reflects a thinner, lighter plate designed for home ranges.
Commercial brands like Vulcan and Hobart specify low-temperature stovetop seasoning. The Vulcan manual’s “one ounce per square foot” at 300-350°F is a precise formula for their heavy, thick steel plates. High heat on a massive thermal mass like that can cause extreme thermal stress.
The Waring Commercial WGR240X outlier demands aggressive prep. Its manual requires pre-cleaning with steel wool and detergent, then an eight-cycle, 1.5-hour stovetop process. This is a response to a specific factory coating that would otherwise block adhesion, not overkill. If your griddle feels unusually slick or waxy out of the box, this step applies.
Easy to miss: The “cool completely” instruction in every manual. Polymerisation finishes as the iron cools. Putting a second layer on a warm griddle interrupts that chemical cure, leaving a weak, oily layer on top of a hard one. The bond fails.
Always find your manual. The 20 minutes you spend reading it will save you the 4-hour reseasoning job later.
Maintaining the Finish: This Isn’t a One-Time Job
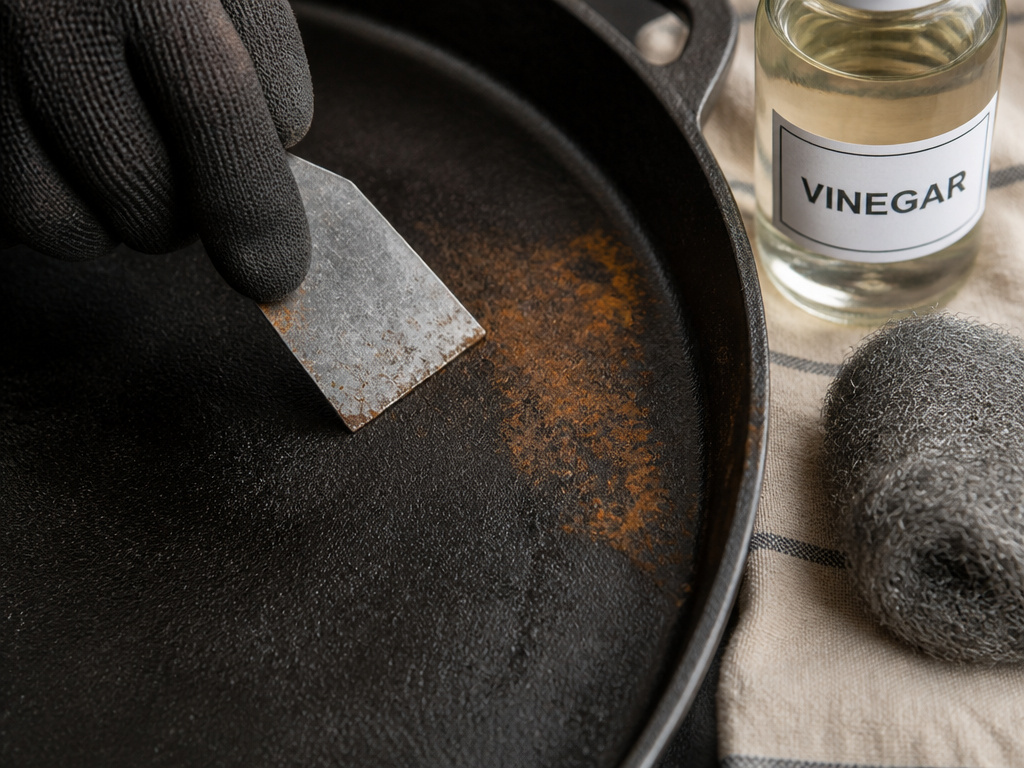 A well-seasoned griddle is a living surface. You don’t “set it and forget it.” You use it, clean it gently, and reinforce the coating.
After each cook: While the griddle is still warm (not scorching hot), scrape off food debris with a flat metal spatula or a dedicated griddle scraper. Pour on a little hot water, never cold on hot iron, and scrub with a stiff brush or chain-mail scrubber. Dry immediately with a towel. Apply a micro-thin layer of your cooking oil before storing.
Weekly deep clean: For built-up carbon, use a griddle brick or screen with the grain of the metal while the surface is warm. You can use a small amount of detergent, but rinse it off completely. This will lighten the seasoning. As the Vulcan manual states, “After cleaning, reseason.” One quick oil-and-heat cycle restores protection.
When rust appears: Don’t panic. Surface rust means the polymer layer was breached and moisture got to the iron. Scrub the rust off with steel wool or vinegar, dry the griddle thoroughly, and reseason the affected area. It’s a patch job, not a failure.
This maintenance is what separates a tool that lasts a season from one that lasts a generation. It’s the reason a Blackstone griddle at a campground and a vintage cast iron plate in a home kitchen both work on the same principle. The material, whether pure cast iron or a proprietary steel alloy, needs that bonded coating to perform.
Troubleshooting Common Seasoning Problems
Sometimes the process goes wrong. The fix is almost always to strip it back and start over with less oil and more patience.
Problem: The seasoning is sticky or tacky.
Cause: Too much oil was applied, or layers were added before the griddle cooled completely. The oil polymerised on top of uncured oil.
Fix: Heat the griddle on a stove or in an oven at 450°F for an hour. This can sometimes “bake in” the sticky layer. If it remains sticky, scrub it off with coarse salt and oil and restart.
Problem: The seasoning is flaking off in patches.
Cause: Contamination under the coating (old food, factory wax not cleaned off) or extreme thermal shock (like pouring cold water on a hot surface).
Fix: Strip the flaking areas with steel wool down to bare metal. Clean, dry, and reseason those spots, feathering the new oil into the surrounding good seasoning.
Problem: Food sticks aggressively after seasoning.
Cause: The seasoning layer is too thin, or you’re cooking at too low a temperature. A true polymerised finish is slick. A thin, partial layer is not.
Fix: Cook more fatty foods (bacon, burgers) to build the coating naturally. Ensure you’re preheating the griddle adequately before adding food.
Problem: Smoke point confusion, my oil smokes instantly.
Cause: Your griddle surface is much hotter than your oven’s set temperature. Infrared thermometers are cheap and definitive. A stovetop burner on medium can easily hit 500°F+.
Fix: Get an infrared thermometer. Season at a true 350-400°F surface temperature, not based on your knob setting.
Frequently Asked Questions
Can I use olive oil to season my cast iron griddle?
You can, but you shouldn’t for the initial seasoning. Extra virgin olive oil has a low smoke point (around 325-375°F) and contains organic compounds that can create a gummy, uneven polymer. It’s better for cooking and maintaining an already-established finish. For building the base layers, choose a refined, high-smoke-point oil like avocado, grapeseed, or soybean.
How many times do I need to season a new griddle?
Aim for three to four full cycles of oiling, heating, and complete cooling. This builds a durable, foundational layer. After that, you transition to maintenance: a quick thin coat of oil after each cleaning. A brand new griddle often has a protective coating that must be washed off with soap and hot water before you even start.
Why did my seasoning turn blotchy and black?
Blotchy, black spots are carbonised oil. This happens when excess oil pools on the surface during heating. The thick oil doesn’t polymerise evenly; it burns. The fix is to scrub the spot lightly with a abrasive like salt or a chain-mail scrubber to smooth it, then continue cooking and maintaining. Prevent it by wiping the oil layer until it looks dry before heating.
Can I season my griddle on my gas grill?
Yes, a gas grill is an excellent outdoor oven for seasoning. It provides even, indirect heat and contains the smoke. Place the griddle over indirect heat (burners off directly underneath), preheat the grill to 350-400°F, and follow the standard oven method. This is ideal for large cast iron griddles for a gas grill that won’t fit in a home oven.
What’s the difference between seasoning a Blackstone and a cast iron griddle?
The core process is identical. The difference is the base material. A traditional cast iron griddle is porous, so the seasoning bonds into the microscopic texture. A Blackstone griddle is made of cold-rolled steel, which has a smoother surface. The seasoning on steel can be slightly more prone to scratching but bonds just as firmly when applied correctly. Always check your specific Blackstone griddle manual for its recommended oil and temperature.
The Bottom Line
Seasoning a cast iron griddle is a chemical reaction you control with heat, a specific oil, and time. The magic number is 350°F for one hour in a home oven.The magic move is wiping off every last visible drop of oil before you heat it.
Start with a scrupulously clean, dry surface. Choose a refined oil like grapeseed or avocado. Apply a layer so thin it seems you made a mistake. Heat it until the smoking stops, then walk away and let it cool to the touch. Repeat that three times.
Then, just cook. The best seasoning comes from use. Maintain it with a quick wipe of oil after each cleaning, and avoid the nuclear option of soap and steel wool for daily care. A griddle treated this way doesn’t just resist rust. It becomes a non-stick asset that gets better every time you fire it up.
