
Learn How to Clean a Burnt Roasting Pan Using a Steam Method
This post contains affiliate links. As an Amazon Associate, we earn from qualifying purchases.
Clean a burnt roasting pan by first identifying its material, nonstick, stainless steel, aluminum, or an electric roaster insert, then applying the matching method. For most pans, a boil with water and vinegar or a paste of baking soda works. For electric roaster pans, the manufacturer-approved fix is a 30-minute steam at 350°F. Abrasives ruin nonstick and anodized finishes; steel wool is only for bare stainless.
The material decides everything. A method that revives a stainless steel pan will strip the seasoning from cast iron or cloud the finish on anodized aluminum. This isn’t about finding one universal trick. It’s about matching three things: the pan’s construction, the type of burn, and the cleaning tools that won’t void a warranty or create a bigger mess.
What follows is the breakdown by material, with the manufacturer specs most guides skip. You’ll get the OEM-approved steam cycle for electric roasters, the test-winning hack from third-party labs, and the exact point where scrubbing does more harm than good.
Key Takeaways
- Electric roaster inserts have a built-in clean cycle: Fill the cookwell with water, heat at 350°F for 30 minutes (per NESCO manuals), then wipe clean.
- Dishwasher tablets beat baking soda in head-to-head tests: Taste of Home found tablets removed burnt food in under 5 minutes with no follow-up scrubbing, but manufacturers warn they can cloud anodized finishes.
- Nonstick and anodized aluminum are hand-wash only: Viking’s manual states dishwasher heat and chemicals cause clouding over time; abrasive pads void the warranty.
- Stainless steel can handle abrasives, but pick the right one: Use Scotch Brite’s “3M Non-Scratch” sponge (per WMF) or a paste of Bar Keepers Friend, not steel wool unless the pan is bare metal.
- Burnt sugar is a different beast: It carbonizes into a glass-like layer; deglazing with boiling water is the first, mandatory step before any other cleaning.
The First Step Everyone Misses (And Why It Matters)
You don’t start scrubbing. You start identifying. Is the black layer sticky, flaky, or rock-hard? Does a fingernail scrape off a gummy residue or just scratch the surface? That tells you what you’re dealing with: polymerized fat, carbonized sugar, or baked-on protein.
Where this goes sideways: Scrubbing a sugar burn first. Burnt sugar caramelizes, then carbonizes into a brittle, glass-like coating. If you attack it dry with an abrasive, you’ll scratch the pan and embed microscopic carbon bits into the metal. The stain becomes permanent.
The universal first step is deglazing, just like you would for a pan sauce. Add an inch of water to the cold pan. Bring it to a boil on the stovetop and let it simmer for two minutes. Use a wooden spoon to scrape the bottom. This hydrates and loosens the burnt layer, whether it’s sugar, starch, or fat. For a roasting pan used for a turkey, this lifts the fond, the flavorful browned bits, without force. Pour out the water and assess what’s left. Now you know if you need a gentle soak or a targeted abrasive.
The 350°F Steam Trick for Electric Roaster Pans
If your burnt pan is actually the removable cookwell from an electric roaster oven, the manual has a specific solution most owners never read. Brands like NESCO and Hamilton Beach design these inserts to be cleaned with a steam cycle.
Fill the cookwell with hot water, place it back into the powered base, set the temperature to 350°F, and heat for 30 minutes. Turn off, unplug, let cool, then wipe clean. The steam and heat loosen everything.
This comes straight from the NESCO 4818-17 18-Quart manual. It works because the sustained, moist heat penetrates the burnt layer and breaks its bond to the metal. It’s the opposite of soaking in a cold sink.
Why the steam cycle beats soaking: Soaking works through slow diffusion. Steam works through rapid thermal expansion. The burnt material and the metal expand at different rates, cracking the bond. It’s the same principle oven self-clean cycles use, but at a safe temperature for the non-stick coatings often found on these inserts.
| Roaster Brand | Model Example | Steam Clean Instructions | What NOT to Do |
|---|---|---|---|
| NESCO | 18 Qt (4818-17) | Heat water in cookwell at 350°F for 30 min. | Do not put the plastic cover in dishwasher. |
| Hamilton Beach | Roaster Oven | Soak burnt pan, then scrub with nylon pad. | Do not immerse the electric base in water. |
| Oster | 20-Quart Roaster | Wash roasting pan with hot, soapy water. | Do not use abrasive cleaners on non-stick surfaces. |
After the steam cycle, use a nylon scrubber or the soft side of a sponge. If any spots remain, that’s when you move to a pasted cleaner. This method preserves the roasting pan materials and finish, which is especially important for the non-stick surfaces common in electric roasters.
Stainless Steel vs. Nonstick vs. Aluminum: The Rules Change
The core principle of cleaning stainless steel does not apply to nonstick. A method for aluminum cookware can ruin anodized finishes. You must match the tool to the material’s hardness and coating.
For Stainless Steel Roasting Pans
Stainless is the workhorse. It can handle heat, acids, and careful abrasion. The goal is to remove the burn without leaving visible scratches that will trap food next time.
- Deglaze with vinegar: After the initial water boil, add equal parts white vinegar and fresh water. Bring to a boil, then remove from heat.
- Apply a chemical cleaner: Sprinkle in 2 tablespoons of baking soda. It will fizz. Let it sit for 15 minutes. This combination dissolves mineral-based stains.
- Scrub with the right abrasive: For everyday burns, use a Scotch Brite “3M Non-Scratch” sponge (explicitly recommended in WMF’s manual). For stubborn, cooked-on patches, make a paste with a powder like Bar Keepers Friend and a few drops of water. Apply, let sit for 60 seconds, no longer, then scrub in small circles with the sponge.
- Rinse and dry: Rinse with very hot water. Dry immediately with a towel to prevent water spots.
Common mistake: Using steel wool on stainless. It can leave microscopic iron particles embedded in the surface, leading to rust spots, a problem called “carbon steel contamination.” Use it only as a last resort on bare, uncoated stainless.
For Nonstick & Hard-Anodized Aluminum Pans
This category includes pans like the Viking Hard Anodized Nonstick. The coating is durable but thin. Abrasives are the enemy.
- Hand wash only: Viking’s manual is clear: dishwasher heat and chemicals cause anodized aluminum to “cloud” over time. Hand washing preserves the finish.
- Use only non-abrasive tools: A soft nylon brush, a sponge, or a cloth. The Viking manual voids the warranty for damage from steel wool, metal scouring pads, or cleaners with chlorine bleach.
- The boiling water method: For burnt-on food, fill the pan with water and a spoonful of dish soap. Bring to a gentle boil on the stovetop, then simmer for 10-15 minutes. Let it cool until safe to handle, then wipe clean with a sponge. The heat loosens, the soap suspends the grease.
What if the nonstick is already damaged? If food is sticking in a specific spot, the coating there is likely compromised. No cleaning method will restore it. Continued use of abrasives will make it worse. At that point, the pan’s best use is for low-stick tasks like roasting vegetables with oil.
For Plain Aluminum Pans
Untreated aluminum is soft and reactive. It dents easily and can discolor from alkaline foods (like baking soda paste) or acidic ones (like vinegar).
- Avoid prolonged soaking: Don’t let a wet aluminum pan sit overnight. It can cause water spotting and oxidation (a white, powdery film).
- Use a gentle abrasive: For burns, a paste of baking soda and water applied with a soft cloth is safe. Rinse immediately after the stain is gone.
- Brighten if needed: If the pan develops a dull oxide layer, a quick wash with a mild acid like lemon juice or cream of tartar mixed with water can restore shine. Rinse and dry thoroughly.
The Test-Winning Hacks (And The Manufacturer Warnings)
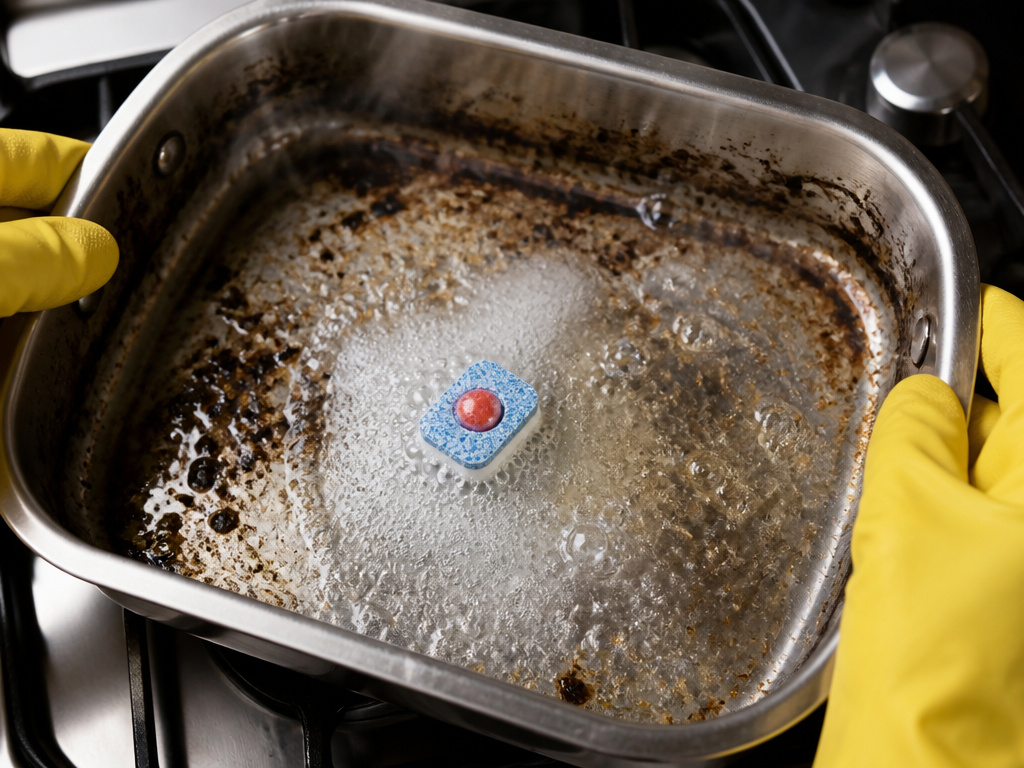
Independent tests from sources like Taste of Home have pitted home methods against each other. Their results are useful, but they sometimes contradict OEM care instructions. You need to know both.
The undeniable winner in their test was a dishwasher tablet. They filled a burnt pan with water, dropped in a Finish Powerball tab, brought it to a boil, and let it simmer. The burnt food lifted in under five minutes with zero scrubbing.
Why it works: Dishwasher tablets contain powerful enzymes and surfactants designed to dissolve baked-on food polymers at high temperatures. They are incredibly effective.
The manufacturer conflict: Viking explicitly warns against dishwasher use for anodized aluminum, citing clouding. NESCO says not to dishwasher the roaster oven cover. The tablets work, but they may accelerate cosmetic wear on sensitive finishes. Use this powerful method on stainless steel or plain aluminum where appearance is less critical. For a burnt frying pan made of stainless, it’s a great option.
| Method | Best For Material | Time | Risk | Source |
|---|---|---|---|---|
| Dishwasher Tablet Boil | Stainless Steel, Aluminum | ~5 min | May cloud anodized finishes | Taste of Home Test |
| Baking Soda & Vinegar Boil | All (except cast iron) | 20-30 min | Can dull aluminum if left too long | Common DIY |
| Bar Keepers Friend Paste | Stainless Steel | 2-3 min | Can scratch if rubbed too hard | Manufacturer Recommended |
| Oven Cleaner (Spray) | Bare Stainless (Last Resort) | 1-2 hours | TOXIC; ruins nonstick; requires full ventilation | Extreme Cases Only |
Another proven hack is the aluminum foil scrub. Crumple a ball of foil, sprinkle baking soda in the pan, and scrub. The foil is harder than the burnt food but softer than stainless steel, so it scours without deep scratching. This is for metal pans only. Never use it on nonstick, ceramic cookware, or enameled surfaces like a scorched Dutch oven.
What Never to Do: The Short List That Ruins Pans

Some actions cause irreversible damage. They come up in forum advice, but they are shortcuts to the trash can.
- Never plunge a hot pan into cold water. Thermal shock can warp even thick-gauge aluminum or stainless steel. A warped roasting pan won’t sit flat and will heat unevenly forever. Let it cool to room temperature first.
- Never use oven cleaner on a nonstick or anodized surface. The lye will eat the coating. It’s for bare metal only, with extreme ventilation.
- Never store food in the pan. Acids from tomatoes or wine can pit aluminum and stain stainless. Salt can corrode surfaces. Always transfer leftovers.
- Never use metal utensils on nonstick. This is how the coating gets scratched. Use wood, nylon, or silicone. If you need to season a pan to improve non-stick performance, that’s a different process for bare metals.
If you encounter a truly horrific burn that resists all these methods, consider if the pan is worth saving. A cheap, thin pan that is warped and coated in carbonized sludge is a candidate for replacement. A high-quality stainless steel pan is almost always salvageable with enough time and the right sequence.
Frequently Asked Questions
Can you put a roasting pan in the dishwasher?
It depends entirely on the material. Stainless steel? Usually yes. Hard-anodized nonstick aluminum like Viking? The manual says no, as it will cloud the finish over time. Electric roaster oven covers (NESCO, Oster) are almost always dishwasher prohibited. Always check the manufacturer’s care guide first. When in doubt, hand wash.
How do you clean a burnt nonstick roasting pan without scratching it?
Use the boiling water and soap method. Fill the pan with water and a squirt of dish soap. Bring to a gentle boil on the stovetop, then simmer for 10-15 minutes. Let it cool, then pour out the water. The burnt residue should wipe away with a soft sponge. For any remaining spots, make a thick paste of baking soda and a tiny bit of water, apply, let sit for 15 minutes, then gently wipe. Never use scrubbers, steel wool, or abrasive powders.
What is the fastest way to clean a badly burnt stainless steel roasting pan?
The fastest tested method is the dishwasher tablet boil. Fill the pan with enough water to cover the burn, add one dishwasher tablet, and bring to a boil on the stovetop. Reduce to a simmer for 5-10 minutes. The enzymes will dissolve the burnt food. Let it cool slightly, then pour out the liquid and wipe clean. Follow with a normal wash. For a burnt cast iron skillet, this method is not appropriate, as soaking can ruin the seasoning.
Why did my aluminum roasting pan turn white after cleaning?
That white, chalky film is aluminum oxide. It forms when bare aluminum is exposed to water and air, especially if it was cleaned with a strong alkaline (like baking soda) or acid (like vinegar) and not rinsed and dried thoroughly. It’s harmless but unattractive. To remove it, wash the pan with a mild acid like lemon juice or white vinegar, then rinse and dry immediately. To prevent it, always dry your aluminum pans completely with a towel after washing.
Before You Go
Cleaning a burnt roasting pan is a diagnostic process. Identify the material, deglaze first, then choose your weapon: steam for electric roasters, paste for stainless, boiling water for nonstick. The most powerful hack, dishwasher tablets, comes with a warning for coated pans. Your best tool is patience, not force. A slow boil lifts what frantic scrubbing only embeds. Keep the manufacturer’s manual closer than the online lifehack. That sheet of paper knows how your pan will fail, and it’s the only guide that won’t void the warranty.
