
Why Does My Dutch Oven Stick? Fix Common Heat and Fat Errors
This post contains affiliate links. As an Amazon Associate, we earn from qualifying purchases.
Food sticks to an enameled Dutch oven because you broke one of three physical rules: heat applied before fat, heat set too high, or food added before the pot reaches its target temperature. The enamel surface needs a thin, even layer of oil to act as a thermal buffer and release agent before any heat touches it. Skip that step, and proteins and starches bond directly to the glass-like surface.
That gap between “heat before fat” and “fat before heat” is where most meals glue themselves to the pot. It’s not about scrubbing power or magic potions. It’s about the sequence of oil and temperature that lets the enamel expand evenly without grabbing onto your dinner.
What follows: the exact 60-second rule that prevents sticking, the electric Dutch oven warning that flips the script, the enamel color that demands a 25°F oven adjustment, and the one cleaning method that makes everything worse.
Key Takeaways
- Oil goes in cold. Always add your cooking fat to a completely cold Dutch oven, then apply low heat. Heating an empty enameled pot risks thermal shock and creates microscopic cracks that food grabs onto.
- Electric models ban preheating. The All-Clad SD922D51 Electric Dutch oven manual explicitly states “Never preheat the base.” This reverses the standard stovetop rule and is a major point of owner confusion.
- Black enamel cooks hotter. A Le Creuset Bread Oven with a black interior can brown food so aggressively it requires a 25°F reduction in baking temperature compared to a light-colored enamel pot.
- Enamel doesn’t need seasoning. Despite some manufacturer advice, the glass-like surface of enameled cast iron is non-porous. Applying a polymerized oil layer does not improve release and can create a sticky, gummy residue.
- Soak, don’t scour. For burnt-on food, a multi-day soak with hot water and dish soap is safer and more effective than abrasive scrubs, which can dull the enamel finish over time.
The First 60-Second Rule: Heat Before Fat
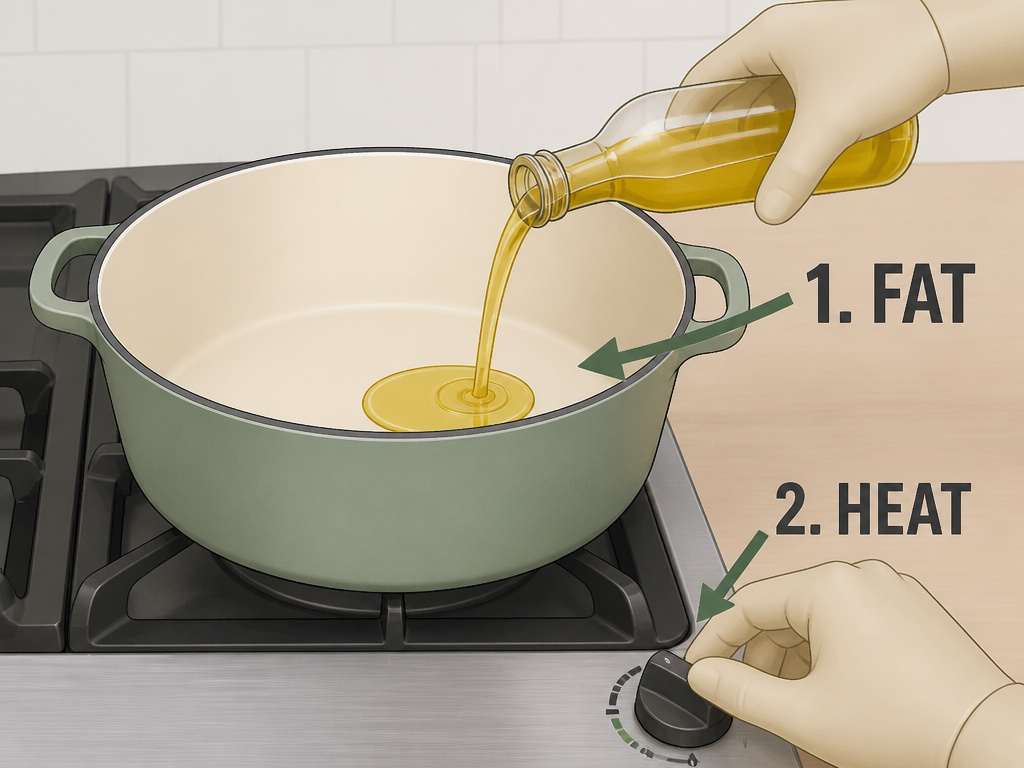
Get this sequence wrong and your pot becomes a glue trap. The rule is absolute: fat before heat.
Enamel is a glass coating fused to cast iron at extreme temperatures. Like glass, it expands when heated. If one spot heats faster than another, say, the center of the pot bottom under a high flame, it expands before the surrounding enamel can catch up. This creates stress. Do it often enough, and you’ll see those faint grey lines, called crazing, where micro-fractures have formed. Food particles lodge in these tiny cracks and burn on.
Adding oil to a cold pot solves this. The oil distributes heat evenly as it warms, acting as a buffer. It also fills the microscopic pores of a well-used enamel surface (even though enamel is non-porous, wear creates texture). By the time the oil shimmers, the entire cooking surface is at a uniform temperature, and a release layer is already in place.
Common mistake: Heating the empty pot, then adding oil. The center reaches sticking temperature (around 350°F for proteins) before the oil can coat it. Eggs, chicken, or even onions will weld themselves to that hot spot within seconds.
The manual for Kohl’s Food Network enameled cast iron states the interior “is not suitable for dry cooking; liquid, oil, fat, or butter should completely cover the interior of the base before cooking begins.” This isn’t a suggestion. It’s the manufacturer’s method to prevent thermal shock and the sticking that follows.
Your process should look like this:
1. Place your cold Dutch oven on the cold burner.
2. Add your cooking oil, enough to coat the bottom in a thin, even layer.
3. Turn the burner to low or medium-low.
4. Wait 60-90 seconds for the oil to shimmer gently. That’s your cue.
5. Add your room-temperature food.
Skip step 2, and you’re gambling with every meal.
Why High Heat Is the Enemy of Enamel

Enameled cast iron is not a carbon steel wok or a raw cast iron skillet. Its strength is heat retention and even distribution, not searing capability. Cranking the burner to high is a direct path to two outcomes: stuck food and damaged cookware.
High heat causes oil to break down and burn onto the enamel surface. This burnt oil creates a carbonized layer that itself becomes sticky, preventing the Maillard reaction (that beautiful browning) from happening correctly on your food. Instead of a crust forming on your chicken, the crust forms on your pot. Furthermore, extreme direct heat is the primary cause of the crazing and chipping that permanently ruins an enamel finish.
The sweet spot for 95% of cooking is low to medium-low on the stovetop. The pot will take a minute longer to come to temperature, but once it’s there, it holds that heat steadily. This is why these pots excel at braises and stews, they apply gentle, consistent heat.
For tasks that genuinely need a fierce sear, use a different tool. A stainless steel skillet or raw cast iron pan is designed for that job. Using a Dutch oven for a hard sear is like using a screwdriver as a chisel. It might work once, but you’ll damage the tool.
| Task | Recommended Tool | Why Not the Dutch Oven |
|---|---|---|
| Searing steak | Cast iron skillet | High heat risks enamel damage & sticking |
| Quick sauté | Stainless steel frying pan | Faster heat response, easier deglazing |
| Simmering soup | Enameled Dutch oven | Excellent heat retention, even temperature |
| Braising short ribs | Enameled Dutch oven | Heavy lid seals in moisture for hours |
If you must use the Dutch oven for a preliminary sear, do it at a medium heat with plenty of oil, and don’t rush. Let the pot come to temperature slowly. Pat your meat dry. The sear will still happen; it just requires a bit more patience.
The Electric Dutch Oven Exception That Confuses Everyone
Here’s where a blanket rule falls apart. If you own an electric Dutch oven, like the All-Clad 5Qt. Electric Dutch Oven (Model SD922D51), the manual contains a critical, non-negotiable warning: “Never heat the pot when it is empty. Never preheat the base.”
This seems to contradict everything. It doesn’t. The warning is about the electric heating base, not the cast iron pot itself. The base contains electronics and a heating element that can overheat and fail if energized without the thermal mass of the pot sitting on top of it. The “pot” in that sentence refers to the removable cast iron cooking vessel.
For these appliances, the correct sequence is:
1. Place the empty cast iron pot into the cold electric base.
2. Add your ingredients, including your fat or liquid.
3. Then select your function and start the cooker.
The appliance manages its own preheat cycle safely. This is a vital edge case. Following standard stovetop advice with an electric model could void your warranty or break the unit. Always check your specific manual.
Black Enamel vs. Light: The 25°F Difference
Not all enamel is created equal. The color impacts performance significantly. Black enamel absorbs and transmits heat more aggressively than light-colored enamel.
This isn’t a minor detail. In a review of the Le Creuset Bread Oven, which has a black enamel interior, testers found it necessary to reduce the baking temperature by 25°F to achieve the same result as in a Dutch oven with a light sand or cream interior. The black enamel caused the bottom of bread loaves to over-brown and potentially burn before the inside was fully baked.
If your Dutch oven has a black interior, treat it as a hotter-running tool. For baking, drop the oven temperature by 25°F from what a recipe suggests. On the stovetop, be even more vigilant about using the lowest effective heat setting.
This characteristic makes black enamel excellent for tasks where you want deep, dark browning, like roasting chicken skin or building fond for a stew. But it demands your attention. A light-colored enamel, like Le Creuset’s “Sand” or Staub’s “Grey,” offers more forgiving, diffuse heat that is less prone to hot spots.
So You Already Stuck It. What Now?
When food sticks and burns on, your instinct might be to attack it with abrasive pads and elbow grease. That’s the worst thing you can do. Scratching the enamel makes its surface rougher, which guarantees even worse sticking next time.
The correct first step is a long, hot soak. Fill the pot with hot water and a squirt of dish soap. Let it sit for a few hours, or even overnight. For truly welded-on disasters, like burnt rice, this may take multiple soaks over several days. The goal is to rehydrate and soften the burnt layer so it releases with gentle wiping or a soft nylon brush.
For stubborn spots after soaking, make a paste of baking soda and water. Gently rub it with your fingers or a soft cloth. The baking soda provides mild abrasion without scratching. Avoid steel wool, Scotch-Brite pads (the green or blue kind), and harsh powdered cleansers.
Where this goes sideways: Using metal utensils or abrasive cleaners. They scratch the enamel, creating tiny grooves. These grooves then trap oil and food particles, which carbonize and create permanent brown stains and a tacky surface that nothing releases from.
If a stain remains but the surface is smooth, it’s likely a mineral or oil stain, not stuck food. This is often a cosmetic issue. A diluted vinegar solution can help with mineral marks. For persistent oil stains, a paste of baking soda and a drop of dish soap left on the stain for an hour can lift it.
The process for cleaning a scorched Dutch oven is about patience, not power. For daily upkeep, knowing how to clean a Dutch oven with just soap and water preserves the finish for decades.
What Not to Do: The Seasoning Myth and Other Missteps
A major point of confusion is seasoning. For raw cast iron, seasoning, building up layers of polymerized oil, is essential for a non-stick surface. For enameled cast iron, it is unnecessary and often detrimental.
The enamel surface is glass. It is non-porous and inert. Applying a layer of oil and baking it on does not bond to the surface like it does to bare iron. Instead, it can create a tacky, uneven coating that collects debris and turns gummy. Some electric model manuals, like the All-Clad’s, suggest a light seasoning for the cast iron component to prevent rust, but this is specific to the rim or any un-enameled cast iron parts, not the cooking surface.
Other missteps have clear consequences:
* Using metal utensils: They chip and scratch. Use wood, silicone, or nylon.
* Thermal shock: Going from a hot stove directly into a sink of cold water can cause the enamel to crack. Let the pot cool significantly first.
* Storing while damp: Both the Kohl’s and All-Clad manuals warn against this, as trapped moisture against cast iron can cause rust to form on the un-enameled rim. Always dry thoroughly, especially under the lid’s rim.
* Ignoring unpleasant odors or browning enamel: These are signs of built-up residue or mineral deposits, not a failing pot. Specific cleaning addresses them.
If you own a raw cast iron Dutch oven, that’s a different story. The need for seasoning is absolute, and the process for seasoning is critical. But for enameled pieces, skip it. Focus on the preheat sequence instead.
Frequently Asked Questions
Can I use cooking spray in my enameled Dutch oven?
Avoid aerosol cooking sprays. They often contain lecithin and propellants that can leave a sticky, hard-to-remove film on the enamel surface. This film then burns on during subsequent uses. Use a regular oil poured from a bottle.
Is it safe to put my Dutch oven in the dishwasher?
Most manufacturers say yes for the enameled pot, but advise against it for the long-term finish. The harsh detergent and high-heat drying cycle can dull the glossy enamel exterior over time. For the proper cleaning methods that preserve the pot, handwashing is always recommended.
Why is food sticking only in the center of my pot?
This is the classic sign of too-high heat. The burner’s flame or element is concentrating heat in a small circle faster than the heavy cast iron can distribute it. The center reaches sticking temperature while the outer areas are still too cool. The fix is a lower heat setting and a longer preheat.
My new Dutch oven is sticking. Is it defective?
Almost certainly not. Enameled cast iron is not non-stick. It requires the correct technique, fat before heat, low temperature, to perform. A “defect” would be a visible chip, crack, or an area where the enamel is missing. Sticking is a technique issue 99% of the time.
How do I care for a Staub Dutch oven versus a Le Creuset?
The fundamental rules are identical: fat before heat, avoid high heat, no metal tools, no thermal shock. The main difference is Staub’s interior is typically a dark, matte black enamel that excels at browning and is slightly more forgiving of minor sticking. For specific cleaning for a Staub Dutch oven, the same gentle principles apply.
Can I soak my Dutch oven if it has a burnt mess?
Yes, soaking is the best first step. For severe burns, you may need to soak a Dutch oven for 24-48 hours, changing the water periodically. This is far safer for the enamel than aggressive scrubbing.
The Bottom Line
A sticking Dutch oven is almost always a user error, not a pot failure. The fix isn’t a stronger scrub brush or a different brand. It’s adopting three mechanical rules: oil in a cold pot, heat set to low, and patience during preheat. Remember the electric model exception, respect the 25°F penalty for black enamel, and never mistake enamel for a surface that needs seasoning. Do that, and your pot transitions from a frustrating glue pot to the most reliable, even-heating piece of cookware you own. The difference is sixty seconds and a teaspoon of oil.
